Climate Commentary – Part Two
I will let the pictures speak for themselves. Edit March 22, 2013 to add – BBC article describes record snows in Europe, so this is not a local event….http://www.bbc.co.uk/news/uk-21885817#
March 18, 2013

March 19, 2013
I will let the pictures speak for themselves. Edit March 22, 2013 to add – BBC article describes record snows in Europe, so this is not a local event….http://www.bbc.co.uk/news/uk-21885817#
March 18, 2013
March 19, 2013
It may be best to provide the good news first and leave my cranky observations about weather to those who can stomach it ![]()
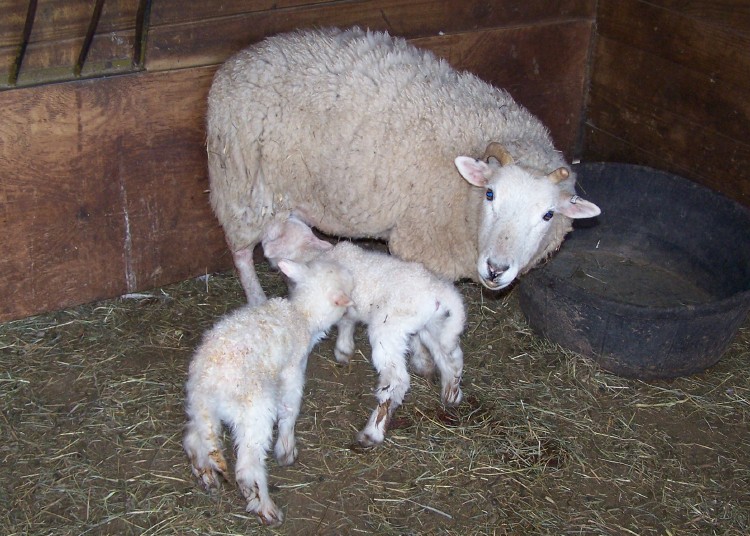
Our little darling, Buttercup gave birth this morning to two darling lambs, both snow white. This is an interesting cross in breeds, as Buttercup is part Jacob and part Shetland, although she has none of the Jacob spotting. The ram was Max, our purebred Friesian who has such a nice fleece. It will be interesting to watch how the fleeces on the two newest develop. Way to go, Buttercup! You’re a good mother! If anyone has ideas about names for them, one boy and one girl, please leave a note in comments.
It was so cold visiting Buttercup and her babies that I had to duck into the Conservatory to warm up. Our little seedlings are progressing nicely, the Broccoli Raab and Kasumi Cabbage (yum, Kimchi) doing the best so far. It was also nice to see that one of the avocado trees is in bloom, finally!

OK, If you are a firm believer that the planet is on the verge of climactic doom, you may want to skip the following. Don’t get me wrong, I care about our surroundings as a steward. Whether we believe in climate warming, climate change, or Climate Gate, we can agree that being responsible and leaving things in even better condition that we found them, if possible, is a mutual goal. I don’t believe in planetary worship, setting planet Earth on some sort of pedestal with annual homage, but I do belive that God asks us to care for the things that He has provided.
My dissent with the climate warming advocates is that their dire predictions are not bearing out with reality in our own backyard. Or actually in lots of places. It is mid-March, and we can see snow in Europe delaying flights, and arctic blasts sweeping across this nation. This morning was 25 degrees and the frozen ground is covered with a dusting of snow. A look at the five-day forecast reveals predictions of highs in the forties for several of the next days, dropping to a high of 39 for Monday.
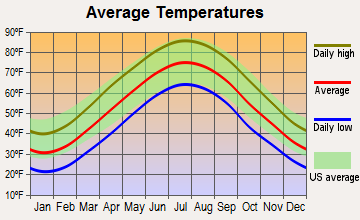
This is not normal, folks. Please take a moment to look at the chart below provided by City-Data.com. This is for Charles Town, WV a good bit north of us here. Please note on it that the average daily high for mid-March is 55.
Average climate in Charles Town, West VirginiaBased on data reported by over 4,000 weather stations
|
Weather.com reported just this week that camel-like animals lived in the arctic http://www.weather.com/news/science/environment/arctic-camel-fossils-20130305 and admitted that the planet may have been much warmer than today. If that is the case, life on earth obviously survived or I wouldn’t be writing this, and you wouldn’t be reading it. Most people are also familiar with the Medieval Warming Period. I have read some climate change alarmists make statements that “this was confined to Europe” although in the absence of any evidence about what went on in the rest of the world, I don’t know how they can make this statement.
Just as the sun goes through its cycles, I believe the Earth does as well. These days it feels like we are getting colder.
Several things to discuss today.
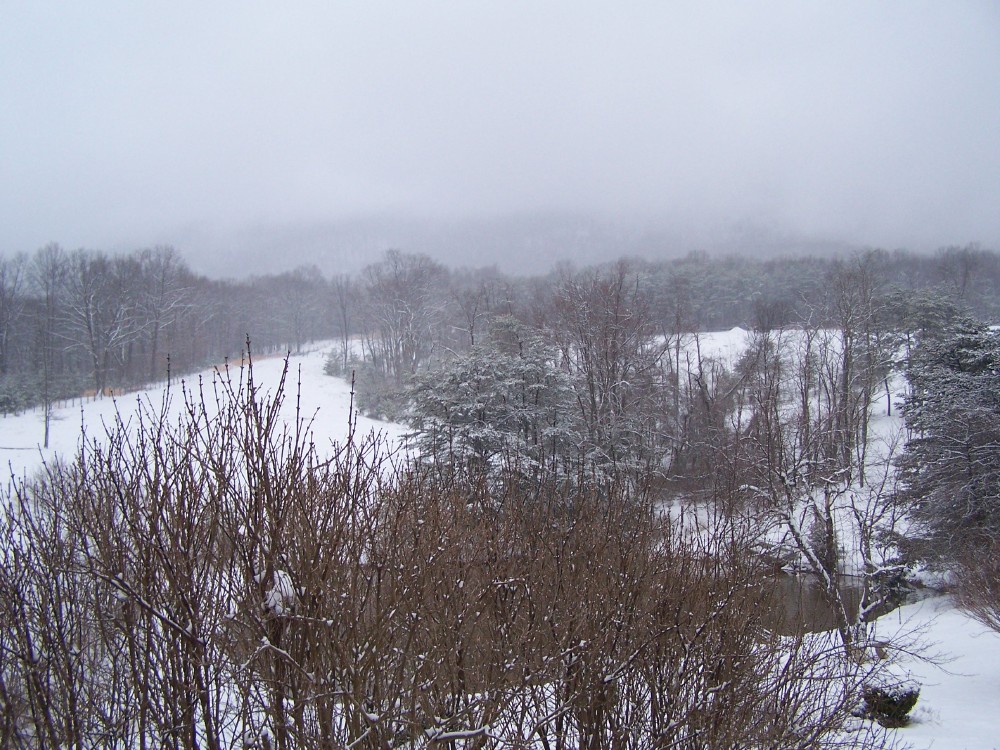
You may remember the first wattle fence article with input from the Frontier Culture Museum. At the time, I advanced the theory with my husband that the wattles would create a cooler area on one side and a microclimate of warmth on the other. Well, I can’t confirm my entire theory yet, since we have yet to finish the fence ![]() Lack of cooperation with the weather I say, but none-the-less, we have been working on raising the other side. I know there are lots of global warming alarmists who insist the planet is getting warmer, but we had snow in October and snow in March, which makes 6 months of snow, and I thought winter was generally three months longs, plus or minus, but I digress….
Lack of cooperation with the weather I say, but none-the-less, we have been working on raising the other side. I know there are lots of global warming alarmists who insist the planet is getting warmer, but we had snow in October and snow in March, which makes 6 months of snow, and I thought winter was generally three months longs, plus or minus, but I digress….
So, despite all the gaps between the branches, and all the sun that it still permits to go through, the snow last week confirmed part of my theory.

We had highs in the fifties both Saturday and Sunday and experienced almost a full melt of the snow. Almost! Here is the one portion of the garden where the wattle is complete. I know where my spinach and lettuce are going this year ![]()
Second, I finished a fun little project, something I had wanted to try lately, one of the little jackets or vest crocheted in the round. This was made in a size small out of 100 percent mercerised cotton from Greece. It has a lovely sheen and a ribbon-like feel. The vest is available in the Meduseld Store.

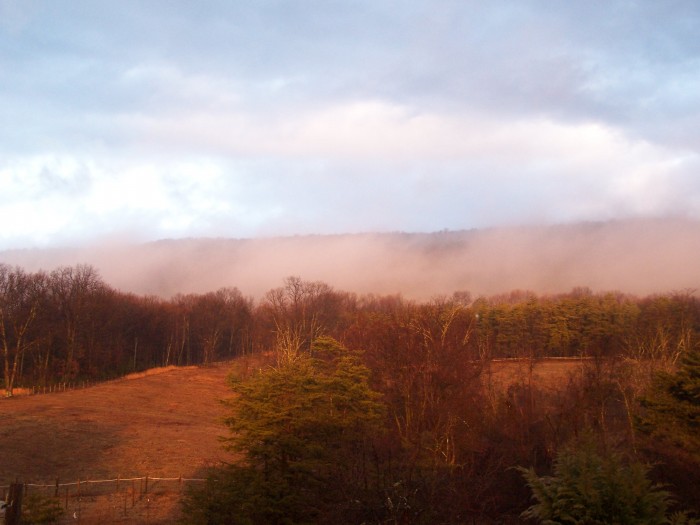
It looks like it will be a gorgeous day. Here is the view East of the dawn through the clouds rising out of the valley.

And here is the view West, with the sun’s gentle pink morning rays. Wishing everyone a lovely day!
And, look who is drying himself from last night’s rain in the morning sunshine…
Today, on the Feast of St. Romuald, we welcome our first lamb of the 2013 lambing cycle. He is a darling boy out of Lisl, a pure bred Jacob, and Samson, a Romney ram. Say hi to Hans!

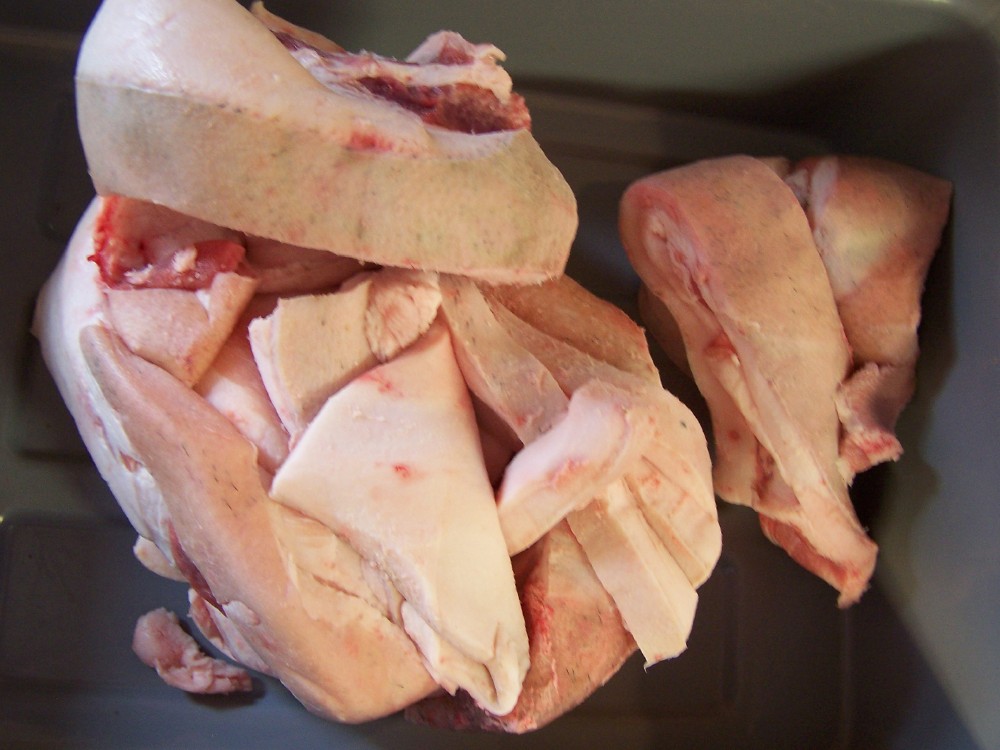
Waste not, want not. Timeless advice we adhere to. In this case, we have purchased a butchered pig from our butcher. We are using the layers of fat next to the skin and throughout in order to render it into lard for cooking for the next several months. This also makes it possible to use everything except the oink.
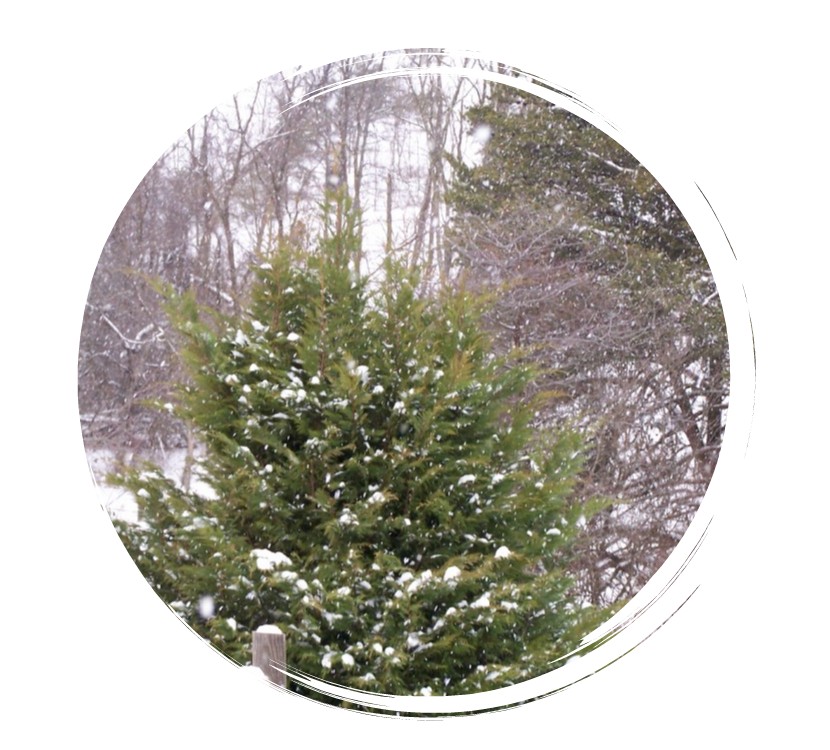
We had a lovely snowy day, and the large soft flakes made the world look like a giant snowglobe.
We learned to render lard about fifteen years ago from neighbors we had at a previous farm. They were true locals having been born and raised in that area. When we first met them their farm did not have an indoor bathroom and they used the outhouse. They butchered several hogs each year, and cured their own meat in a curing shed built specifically for that purpose. It was an incredible learning experience, to help them on butchering day, and the camaraderie and joviality of the day always made it something to look forward to.
It may be difficult for some to see this the same way, and I understand. However, one thing that stood out to me was that in these old-fashioned butcherings, there was absolutely no waste. From the head, which they boiled to make Head Cheese, all the way to the tail which went in the lard rendering, every portion of the animal was used.
It is a good idea to do the cooking outside, since boiling fat can generate a lot of splattering grease. But we are going to start indoors in order to cut the meat. We are starting with the pork scraps provided by the butcher. In addition to all the nice cuts of meat and sausage, we also received all the belly fat and skin pieces, which have lots of fat attached to them. Those are the parts you can buy in the grocery store as “pork rinds” those fluffy salty bits of pork. These scraps have a long way to go to look like that.
The smaller you cut the pieces, the faster and more thoroughly they will render. We cut them into approximately one-inch (2.25 cm) pieces. The fat is easiest to cut if it is still quite cold and firm.

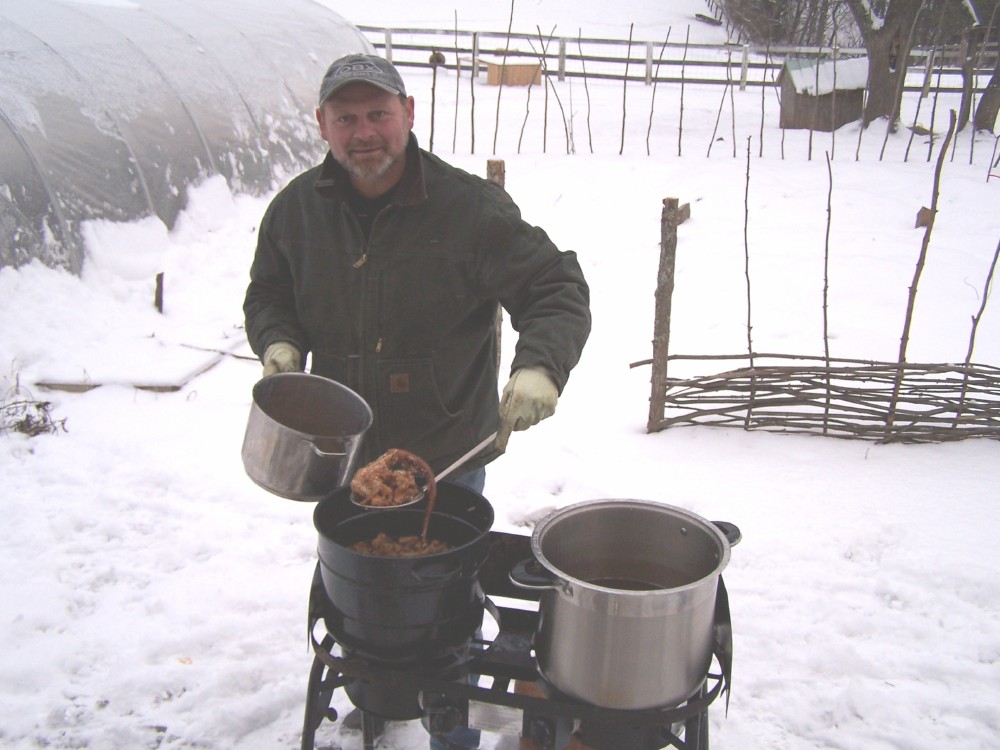
Then we move outside to boil and reduce these pieces. This demands constant supervision, since the goal is to have the boil hot enough to extract the fat from the pieces, but not to burn the fat. There is also the risk of fire so its best to keep a close eye on this process. When cooked long enough, the skin pieces will start to “puff” like the store rinds.
When the pieces are a deep golden brown and starting to puff, they are removed and placed in a lard press. These presses are getting harder to come by, but there are still some suppliers that carry them. The lard press can also be used for making apple cider, so it is a handy dual purpose machine to have around. The press exerts considerable pressure to the cooked pieces and extracts the fat out which pours into a large pot. In the picture below, you can in the bowl see the pressed rinds in the shape of a disk.

Finally we filter and put the rendered lard into containers. Some farmer supply stores sell tins made specifically for this. They are usually large and cumbersome, so we have found that cookie tins work very well. If you decide to use cookie tins, make sure that the container is not leaking as you pour in the hot fat. We pour the fat through a cheese cloth in order to filter out the last bits of rind. These are the coveted “cracklings’ that made the Ingalls children so happy in the Laura Ingalls series of books. We put the containers outside again to cool quickly, and we are left with beautiful white cooking and baking lard.

If I get a chance in the next several days, I’ll provide my lard-based pie crust recipe. Any questions? Email!
Food is an important part of life here at Meduseld. It’s why growing natural healthy food is such a priority. And, it tastes better. The lamb just tastes GOOD. The children are gnawing fresh-picked carrots and talking about how sweet and juicy they are. The vegetables look and taste so wholesome.
Today, we are going to cover another breakfast that is one of our favorites here, Country Eggs Benedict.

If you are following paleo guidelines, you can omit the bread from this recipe. Otherwise, charge forward! For some of the ingredients I won’t list an amount, because it will depend on how many people you are cooking for. This applies in particular to bacon and bread.
Ingredients:
This was homemade spelt bread, toasted in a skillet with olive oil.
Fry the bacon – reserve in warm oven.
To make the tomato mix:
Chop one large tomato. Chop basil (or spinach, arugula, or other greens of your choice). Saute in skillet with olive oil. Salt, pepper and garlic to taste. Add about one tablespoon balsamic vinegar. Once heated through, turn off heat and keep in warm place.
To make the Hollandaise:
Some recipes recommend a double boiler and I think this is the reason more people don’t make this delightful sauce. Let be honest, any mention of the double boiler and people think “this is going to be complicated” and that’d the end of it. I don’t use a double boiler and you don’t have to. I use a thick bottomed pot and the lowest heat.
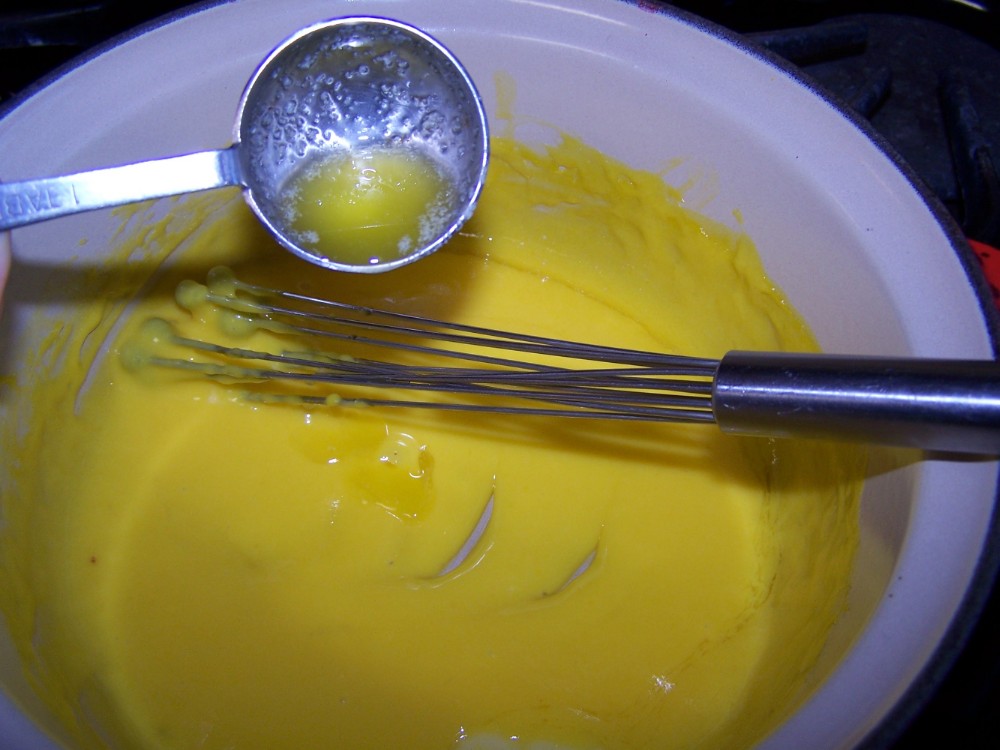
Over low heat, stir 3 egg yolks with juice from one/half lemon. Cut cold butter into pieces and as pan starts to warm, gradually add pieces of cold butter. Stir frequently. Don’t add another piece until the previous one is incorporated into the yolks. Most recipes call for unsalted butter, but we use Amish roll butter which is salted. I know its some culinary sin that would get me kicked out of Le Cordon Bleu, but you use what you have, right? The sauce will begin to thicken and once you can see the bottom of the pan, like this, turn off the heat.
Take the melted butter and add one tablesoon at a time into the sauce. Stir well to incorporate each spoonful. Add salt and pepper to taste.
To poach the eggs:
Take a pan with a large surface area. Fill to only about 1/2 to 3/4 inch with water and add two tablespoons vinegar and one teaspoon salt. Bring to a simmer. If you boil the water, the eggs will break apart. What you need is simmering hot water so that the water is not disturbed.
Break an egg in a small cup and gently pour it into the simmering water. The slower you are the more intact the egg will remain. allow the egg to start forming firm edges. Once it has, you can start ladling some hot water over the egg, and this will firm up its surface. Cook until there are no clear parts left of the egg white.

My apologies this photo is not clearer, but the lense kept steaming up from the simmering water.
Now, assemble. Take reserved toast, bacon and place on plate. Ladle a hot poached egg onto the bacon. Place a couple spoonfuls of Hollandaise on the egg, and to top it off, a spoonful of the tomato-basil mix. Serve!
There has been all sorts of activity at Meduseld these last few days, so it is time to catch up.
With the burst of warm weather last week, some of the maples are starting to give sap. The best weather pattern for sap is freezing nights with above freezing temperature days. Once this cold snap moves through, we may be heading into ideal syrup weather. Stay tuned.
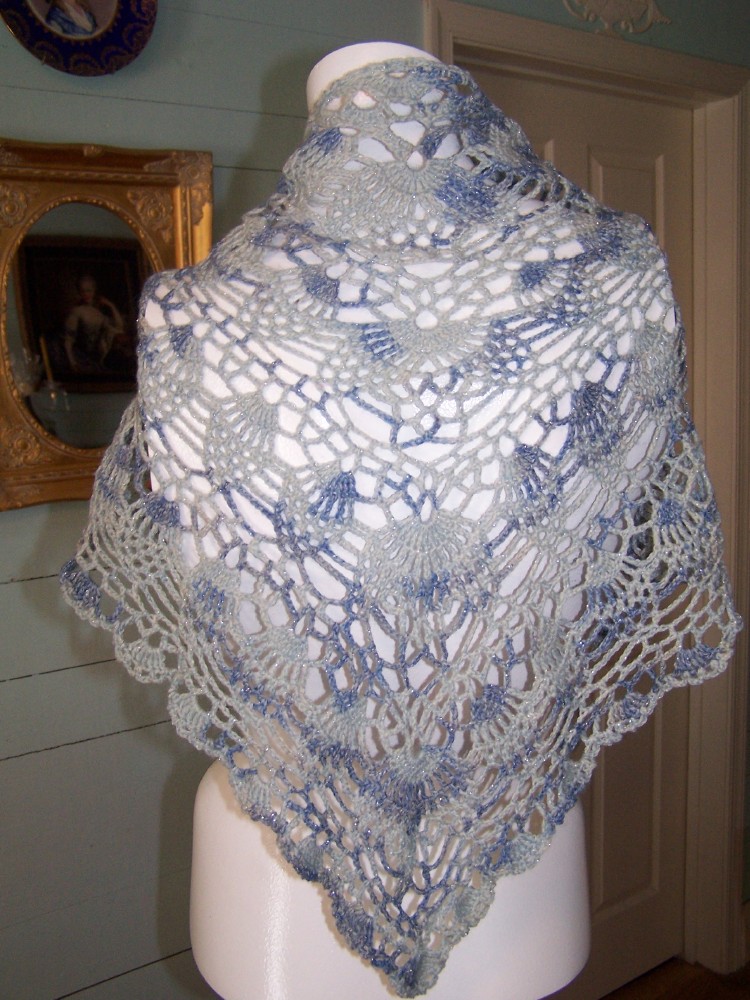
Tomorrow should see some new items in the store. I have been wrapping up (pun intended) two shoulder shawls (wraps) to sell, and there will be a little more wool. Also, last week a large box of dyed wool went off to the fiber mill.
A hint of an item going in the store…
We also butchered some older hens over the weekend, and continue to see progress in the chickens’ health since we added fermented feed to their diets. These stew hens were filled with the rich golden fat that makes such wonderful broths.
We also had friends come to visit. During one of the visits our friend was sampling all the diverse lacto-fermented items we make here. The idea came up for a lacto-fermentation workshop. If you live in the area and are interested, please email me and we’ll try to set up a date. For those who live further away, I will try to cover this topic thoroughly in a future blog.
This weekend the weather was gorgeous. Highs in the 60’s with sunshine. It seemed a perfect time to start a project we had been discussing for some time, making a wattle fence.
Here you can see a picture of the fence that had been in place. Functional, yes, attractive, NO! However, with all the feathered friends that run around this property, it is important that we close some areas off to them, otherwise, no vegetables for us.

Our garden used to be in rows, but last year we went to permaculture inspired “key-hole” beds. The garden is divided into sections and the interior of each section is accessed by a small path called a keyhole. The garden will not be tilled, and the soil is not compacted by walking on it. It has it pros and cons. One of the benefits is that while with row gardens, fifty percent of the garden is walked on, with Key-hole gardening, about 70 percent of the garden is plantable space. The stones are my hose guides.
Back to fencing…
There were several reasons that we choose wattle fencing. By placing a more solid type of fencing on the north side of the garden, we are hoping to create a micro climate in the garden. The fence will protect the garden from the wind, and hopefully hold in more heat from the sunlight. We also chose the wattle fence because it uses available resources without us having to purchase fencing. This fence will be a great deal more work, but there is no expense involved. Another benefit is that we are thinning the saplings and branches and creating areas where the remaining trees will not have to compete as much for nutrients and sunlight.
There are actually technical terms for the parts of a wattle fence. The uprights are called “sales” and the horizontal branches are called “weavers.” The sales can be a bit sturdy, but the weavers need to be thin (less than an inch in diameter) green, (fresh woods bends more easily) and long, as long as you can find them.
Here we have started setting the sales. At each end of this section we have placed locust wood posts. Locust wood does not breakdown quickly like pine, and so these posts should be around for a while – hopefully ten years or more. Between the posts, we have placed the sales at approximately one foot intervals using a tape measure. We forced the sales into the ground using one of two methods, “drilling” holes with a cordless drill with a massive bit, or with a post hole digger. Post hole diggers can be bought at hardware stores. The sales should be firmly in the ground for the integrity of the fence.

Now we can start with the weavers. Starting at one side, gradually work a trimmed branch between the sales. Make sure that the branch extends slightly beyond the post. When the weaver is used, start with another weaver around the same sale and proceed across the row until reaching the other posts, and leave the excess there. Now return across the row you have just made, making sure that you alternate which side of the sales you are weaving through.
Historically, wattle fences were also made into “hurdles,” short eight to nine foot sections of fencing built into logs or boards about the size of railroad tracks instead of into the ground. These sections were used as moveable fencing for sheep for pasture rotation. With hurdles, the ends of the weavers were not left as we describe above, but were twisted and turned to wrap back around the post into the sales again. This makes a very durable hurdle, but in our case, we need the posts to hold our gates, and so we cannot wrap the weavers or we won’t be able to mount the gate hinges.
We have now done several rows of weaving. This is forming a strong fence – each row of weavers is making it more durable.

Here is how it stands today. It is a work in progress with a deadline. This fence must be done before the seeds are planted in the spring!
If memory serves correctly, the Frontier Culture Museum in Staunton, Virginia had a wattle fence surrounding their German homesteader garden. This living museum is a wonderful place to acquire old time skills and we recommend this place heartily! There are docents in period costume showing old world skills, and they often invite the children to participate. It is very family and children friendly, and if someone in your group cannot walk the entire tour, the Museum rents family-sized golf carts for touring the farms. Here is their website. http://www.frontiermuseum.org/index.html
In addition to touring the grounds, you can attend diverse classes and there are even homeschool events. This is one of the best and most educational opportunities in the Shenandoah region, and it is engrossing for the children as well.
Noon update: Since posting this morning, I was delighted to get this email from Alex Tillen at the Frontier Culture Museum (FCM).
“This spring the Museum once again will build a wattle fence on the Irish farm out of ash, willow, and any sapling we can find on the wooded areas of the Museum. This time we are going to use locust saplings as the post to see if they will last longer then a few years. We also plan to make some wattle hurdle fence sections on the Irish farm.”
He also provided these photographs of wattle fences the FCM had had in the past. Sincere thanks to the Frontier Culture Museum!


At fiber festivals you’ll sometimes hear people talk about the cost of custom wool yarns. “Yarn doesn’t cost this much at (pick your favorite craft store).” This post will show some of the differences and costs of store vs. custom yarns. Included in the custom yarns are the quality oriented yarn companies that you can find at yarns shops, as opposed to Walmart or Joann’s.
Let’s look at the differences first. The most obvious is the fibre content, and the content of the majority of yarns from Caron and Lion Brand and other mainstream producers are acrylic and nylon – petroleum products. There are benefits to these yarns, and I even have used them from time to time. Those benefits are:
That’s where the benefits end. Here’s where those fibres begin and it isn’t pretty.
(Oil Refinery)
These yarns won’t decompose in the trash and they won’t break down for years in the environment. Additionally, synthetic yarns do not let your skin breath and they contribute to creating a demand for oil products and a dependence of foreign oil. Not good. When you consider the last disaster in the Gulf, maybe less oil is better.
But let’s get back to why custom wool costs more.
Here’s where wool fibres begin, and it is pretty:

Synthetic fibre hasn’t been fed for a year before shearing. The darlings that produce wool, sheep, alpacas, those fuzzy cashmere goats and Angoras, all have to be fed for the entire year in order to harvest their fleece. In some cases this is not too expensive if pasture is available and adequate. During the winter, though, farmers still end up having to “hay” their flocks. (As a side note, some natural resources experts are starting to see the value of grazing sheep on midwest wild prairies – turns out its good for the prairies….that will be the subject of a future article.)
Synthetics don’t have to be shorn. Each spring, the sheep are shorn of their fleeces. This benefits both the shepherd and the sheep, as the summer heat would be intolerable for the sheep with long fleeces. The going rate is $5-6.00 per sheep, and that does not include transportation. Each farmer has to budget for shearing day.
Custom mills cost more per pound than corporations. If one were the head of Synthtic Yarn, Inc (fictional name) you’d approach to mega mill and get a cost of dollars per pound. When a small sheep farmer approaches a mill, it usually a straight $23.00 – $30.00 per pound, depending on the mill, the type of fibre and number of plies. If you were to send less than ten pounds to be processed, there is usually a surcharge for that.
What all this means is that the standard four-ounce (quarter pound) skein of yarn is going to have to cost about $7.00 just to make up the cost of processing. That doesn’t include the cost of the fiber festival registration, the overhead and infrastructure of the farm, the feed, the shearing, the veterinarian, or last of all, a small income for the shepherd(ess). There are also the unexpected losses – my dear friend Eva lost her sheep to a bear last fall.
Some of the more exclusive larger yarn companies have found ways to get around this by making their skeins smaller. I am holding a ball of yarn from S. Charles called Adele. It is 20 percent mohair; the rest is viscose, polyester, and polyamide. The weight of this ball is only 1.75 ounces, or 50 grams! The retail price on this little gem is $20.95! That’s over $160.00 per pound!
Please support your local wool producers. It supports them, keeps local lands undeveloped and does not support oil dependence!
Get the full ![]() experience!
experience!