Archive | farm life RSS feed for this section

Conservatory Gardening

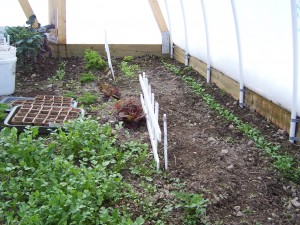
Hoop houses are a wonderful way to extend the growing season, but what if you want to grow tropicals?  The winter temperatures would still destroy these tender sun-loving plants.  But even in this area it is possible to grow a West Virginia banana.  The answer is to build a conservatory.

This a a picture of our conservatory.  From the outside you cannot guess the treasure that lives within. 

100_5042 

 It is a true living room, where beneficial soil bacteria, and insects are actually encouraged to grow.  The goal is to obtain a small ecosystem that balances itself with beneficial insects so that pesticides don’t ever have to be used.  Since we don’t sell any plants, we are comfortable with a higher level of insects than many people might tolerate.   We have also released batches of various beneficial insects to address any insect problems that did arise.   When you walk through this building, you find spider webs and frogs, a salamander hops into the little goldfish pond – it’s all very ALIVE.

 musa vente cohol


Here is a banana that is in “bloom,”  called Musa Vente Cohol.  It has pushed out immature banana clusters that will grow and ripen over the next several months.   Behind, you can see an avocado tree that has not started to produce yet, despite being over 10 feet tall.

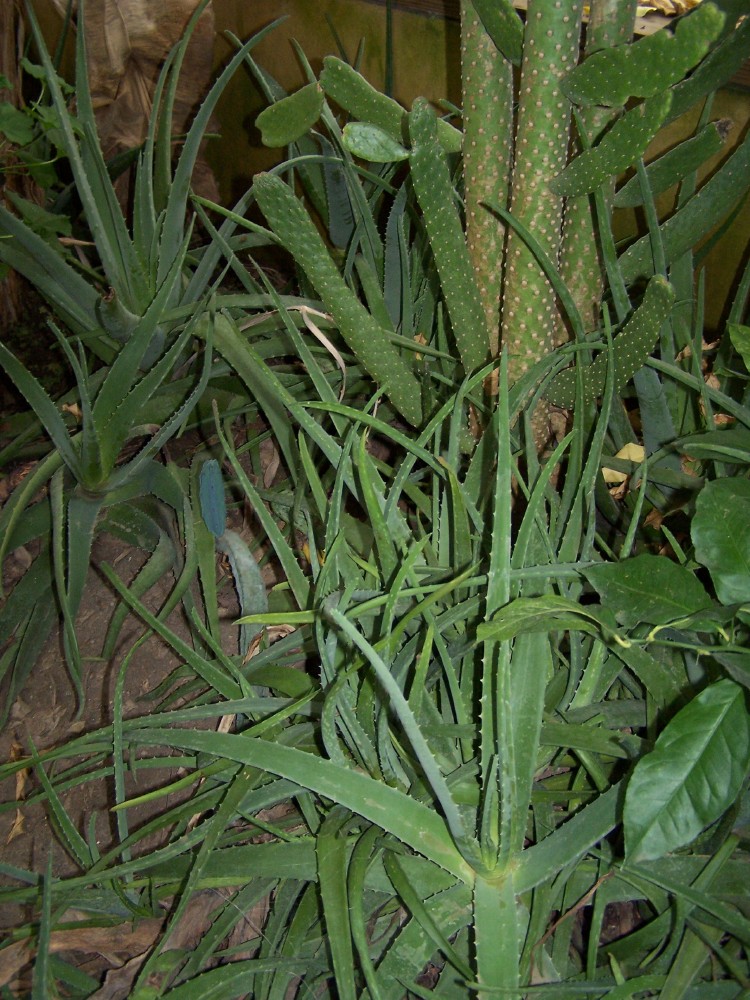
Here is a cluster of aloe vera growing in an area designated for more desert types of plants.  This aloe vera is growing in the shadow of a cactus that is now about seven feet tall. 

 aloe vera


Here is a Monstera deliciosa producing a fruit.  This kind of plant grows in the tropics and in some areas, like Hawaii, is considered invasive.  It makes a gorgeous house plant, but in this case it is gradually taking over its corner of the conservatory.  We regularly have to cut it back since it now sprawls over about 15 feet.

sponge fruit


Another plant that has to be kept in check is the Bougainvillea.  It is a thorny trailing plant that grows rather large and has paper like flowers in a bright fuchsia color.  This plant grows in tropical climates, Florida, the British and U.S. Virgin Islands.  It is said to have come from Brazil, where is grows abundantly.  The Bougainvillea in this picture has to share its space with another Brazilian tree, the Jaboticaba.  The Jaboticaba has an unusual way of growing its dark purple round fruits.  Instead of hanging from the outer branches, the blossoms and eventual fruits come right out of the thicker parts of the trunk, looking like something Dr. Zeus might have thought up.

  bougainvillia

 Citrus also does very well in this protected environment.  Lemons, limes, grapefruit, mandarin and orange trees are all included, and we are lucky to have a couple producing fruit right now.  Both the Kefir Lime, used in traditional Asian cooking, and the Naval Orange, have fruit, and they bloom several times a year, filling this living room with perfume. 


kefir lime

 Now for the techincal information.  This conservatory was built on a cement and cinderblock foundation and was framed with 2×8 pressure treated pine. The center of the floor was left as dirt, and once the foundation was done several truck loads of compost and top soil were added.  The trees and plants are planted directly in the ground.  The walls are 3/4 inch polycarbonate, much thicker than greenhouse kits that are available.  The conservatory, house and hot water are all heated with an outdoor wood burning furnace and this can be economical if you have enough wood so that you don’t have to buy it.  In our case, we have enough forest that we can’t keep up with the standing dead trees, so for us this is feasible.

In the recent past is has been unpopular to burn wood – some people asserted  it was bad for the environment.  The opinion of envirnmentalists is changing however, since this is a renewable energy source.  I am not fond of GreenPeace as an organization, especially its extremist positions and tactics, but one of its founders did say this:

“Forestry is the most sustainable of all the primary industries that
provide us with energy and materials. To address climate change
we must use more wood, not less.  
Using wood sends a signal to the marketplace to grow more trees.”          
~ Dr. Patrick Moore, Co-founder, Greenpeace~ 


Dying Wool

Another winter acivity at Meduseld is preparing wool for hand spinning or for sending off to the fiber mill.  Yesterday, I spent much of the day cleaning and dying wool.  These batches of wool will be combined into a multi color yarn.  Following are the steps to clean and dye the wool.

I took Royal’s fleece from last year.  She is a lovely purebred Romney ewe who is friendly and always one of the first at the feed trough.  She produces a high sheen yarn and she makes about 8 pounds of fleece per year.  That is the weight before it is washed of its lanolin.  Between that and the loss that always ocurrs during processing, we’ll end up with about half of that in yarn.

First, take the fleece and wash it in the hottest water the tap will provide.  Dawn dishwashing soap seems to be a favorite among wool enthusiasts, but we prefer to use organic detergents.  Usually, we use Ecover which does a wonderful job removing the grease.  You want to make sure you don’t handle the wool too much  – its not like hand washing clothes.  You want to move it about enough to get it to shake free the dirt and lanolin, but you don’t want to over compensate and felt your fiber.  Felting just doesn’t come undone.  Rinse several times with hot water until the water comes out clear.   I don’t worry about making it crystal clear at this point since I am about to simmer the wool.  Here is the cleaned fiber in a large stainless pot.


It is important to use stainless or enamal cookware since we are going to be using Cushings Perfection acid dyes.  You don’t want to have a chemical reaction with your pot or stirring spoon, and aluminum will react.  I am using a stainless spoon, but I also have a wooden spoon that I reserve just for dying wool.

This is what the Cushing Perfection Dye packets look like.  Each packet is costs around  $3.00 and will color approximately one pound of wool, although I have had success with larger amounts.   Cushing recommends 1/2 cup vinegar per pound of fiber, but you can use more.  I used one cup of white vinegar that you can buy at any grocery store.   A good pair of rubber gloves would handy, too.

Combine boiling water, the dye packet and the vinegar.  Try to eyeball how much water you’ll need to cover the amount of wool you are dying.  Cushing says to wet the wool, but ours is already wet from washing.  Now, quickly and smoothly, put all your wool in the pot.  You have to be rather quick about it, or the portion you put in first is going to be darker than the part to go in last.  Stir the fleece around a bit and make sure that all parts are exposed to the dye liquid.

Now, we are going to heat this back up to a simmer and let it stay that way until the wool absorbs the dye.  You can see the difference, because suddenly the water will go from being richly pigmented, to suddenly looking almost clear, and your wool will have taken on the dye.  It is very important to continue to gently stir periodically during this process so that you achieve even distribution of the color.  Here is a picture of my dye pot, and you can see around the edges that the water is still quite dark.

Cotinue stirring until the water clears and look for uniform color in your wool.  This blue is turning out nicely, with deep bold coloring.

Take the pot off the stove and drain the wool.  Rinse several times in hot water until the water is clear.  You don’t want to rinse in cold water because this might cause the wool to felt.  It is important to make your temperature changes gradually.  I make each rinse slightly cooler so that by the last rinse I can handle the wool.

Now the wool goes out on the drying racks.  This time of year it may take several days to dry, especially if the temperatures remain freezing.  During the summer, it will dry overnight.  Here I have several batches set out to dry. 

You can see Cushing’s Blue, Burgundy, and Egyptian Red drying on my porch.  When these are dry enough to card, which means to comb the fibers, I’ll have a post on carding and spinning to make a multi-colored yarn. 


New Winter Projects and Yarn Review

Sometimes at Meduseld, we do use yarn that was not made by our own flock.  This morning I finished putting together two sweaters I had been working on since a few weeks before Christmas.   In this case, I used a Lion Brand Yarn called Amazing because I was intrigued by the color palettes that the line had.  The larger sweater was knitted in the color Glacier and the smaller was done in Wildflower.

The recommended knitting needle size was US 9, but both were knitted up in US 7 in order to get a smoother look.  The smaller sweater was finished around the neck with crochet, and I used an F hook instead of the suggested J.   I used four skeins for the small sweater and 5 skeins for the large, although I bought extra.  The extra was used to match colors when a skein would run out, so now there is leftover yarn, but it helped prevent abrupt color stops and starts.

This was a very nice yarn to work with.  The yarn is composed of 53% wool and 47% acrylic and does not have an artificial feel.  Fortunately, it is machine wash cool, and dry flat, which makes it easy maintenance, especially for children’s clothes.  There were few down sides.  One was that this yarn does not unravel easily; there is just enough fuzz that it catches and prevents undoing your work.  I only had to do this once, on the crochet edging, but it did prevent me from unwinding as far back as needed.  The other downside is matching all the colors in a way that makes the garment look uniform when finished, especially when making the seams at the end.  My great knitter friend has been knitting most of her sweaters lately with the top down method on circular needles so that she has fewer seams, and I think this yarn would benefit from this method, as it would likely show off the spectacular color patterns to their best advantage. 


Hoop-house Gardening

As promised, we are starting with the first post about winter farm activities, and it is one of our personal favorites. 

We began hoop house, or tunnel gardening after I bought Eliot Coleman’s book, The Four Season Harvest, as a Christmas present for my spouse.  We started our first hoop house that January, a small structure, only 12×16 feet, made of PVC pipe and some boards.  By March we were enjoying salad, radishes, and cilantro.  That winter may have been a warmer winter than most, but we were sincerely impressed with our first attempt.

Inside first hoophouse.  First year.  This also gives a good look at the PVC bracing for do-it-yourselfers who want to make one for yourselves.

Inside first hoophouse. First year. This also gives a good look at the PVC bracing for do-it-yourselfers who want to make one for yourselves.

That little structure is now gone and has been replaced by two sturdier versions made of bent fencing and a wood “foundation.”  Both are set directly on the ground and we plant directly in the soil.  We have one layer of agricultural plastic on one and two layers on the other.  Each layer is supposed to give us approximately one more agricultural growth zone, but we find that the extra layer actually reduces the amount of sunlight, so you don’t actually get two full zones.  Meduseld is in a 6b agricultural zone, and we are not getting to 8b with the extra layer.  We find that the plants in the one layer house seem to do better, and when the weather warms, we will reduce the other to one layer as well.

We have been working on amending the soil gradually and I wish we had focused on this more during construction phase.  We have still had to contend with insects and less than ideal growth at times, and we think this is due to the fact that we did not follow all Mr. Coleman’s advice about soil amendments, especially copious amounts of compost.  Over the years, we have gotten better at composting, and hopefully this will pay off.

None-the-less we have enjoyed chard, lettuce, fresh herbs, brassicas, every year since but one.  That year was exceptionally cold and there was not enough sunlight to warm the soil during the day.   We could have resorted to heating the tunnels, but that seems contrary to what we are trying to achieve – namely growing produce without consuming non-renewable energy.

Hoop houses are wonderful for rotating “crops” and for extending growing seasons.  There is also no waste.  Anything that does not do well,  becomes overgrown, or gets insects, becomes chicken feed.  We see this as a win/win situation even if we can’t put something on our table – we’re certain the chickens are glad for fresh greens in the middle of the winter, or as the case today, right after a snow storm.

Mr. Coleman’s book had excellent charts with plants that can be grown during the winter months and that are tolerant to cold temperatures.  We strongly recommend this book and it is available in the Meduseld Amazon store.


Merry Christmas!

Merry Christmas wishes from Meduseld!

There is the impression that farm life slows during the winter months.  Not true!  We are going to share the activities of the cold months with you and provide links and information so that you can do these as well.  Of if you prefer, you can just follow along, as we work here at Meduseld.

We have been asked – why Meduseld?  Meduseld is the anglicized version of the anglo-saxon word maeduselde, which means mead hall.  Since we raise bees and are interested in Beowulf and medieval hsitory, we thougth the name is appropriate.  We choose to use the simplified version; its much easier to provide as a web address:)

The next posts will cover hoop or tunnel house gardening, maple syrup making, spinning and dyeing wool, and livestock care.

 logo_meduseld150B