Archive | Food RSS feed for this section

Meduseld Pick-Your-Own Grapes

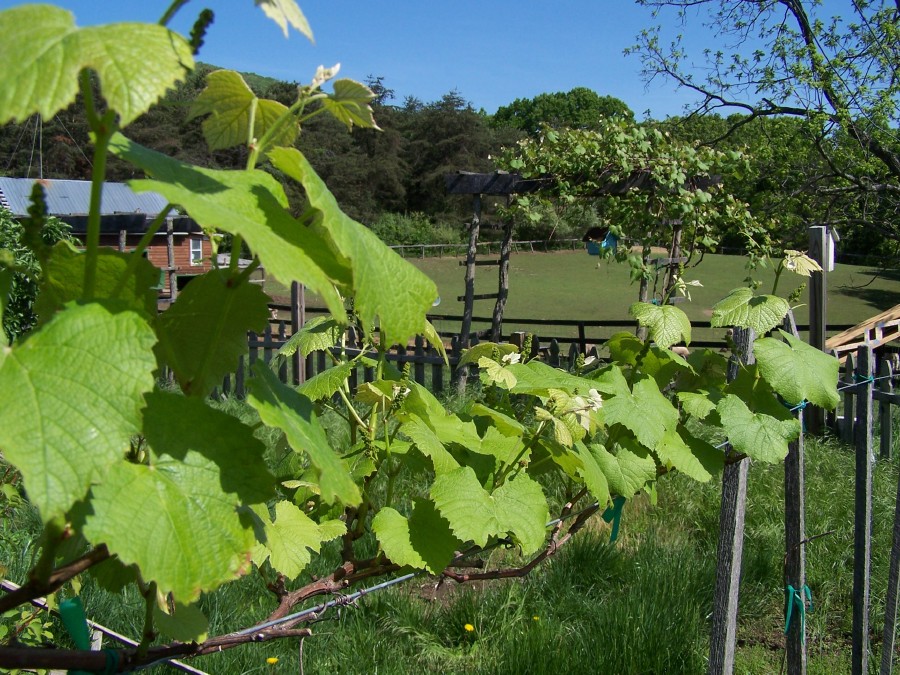
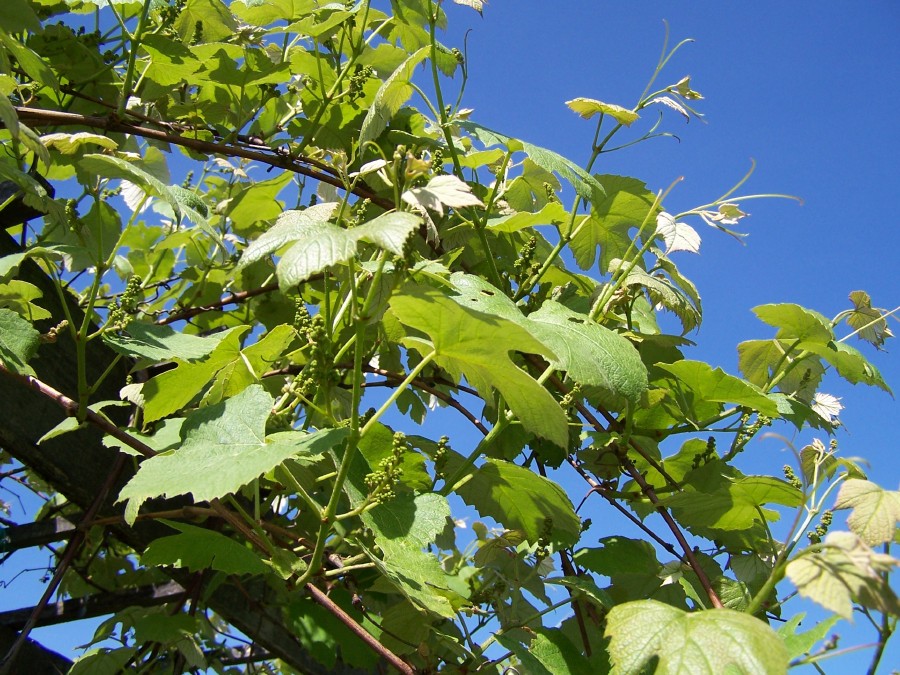
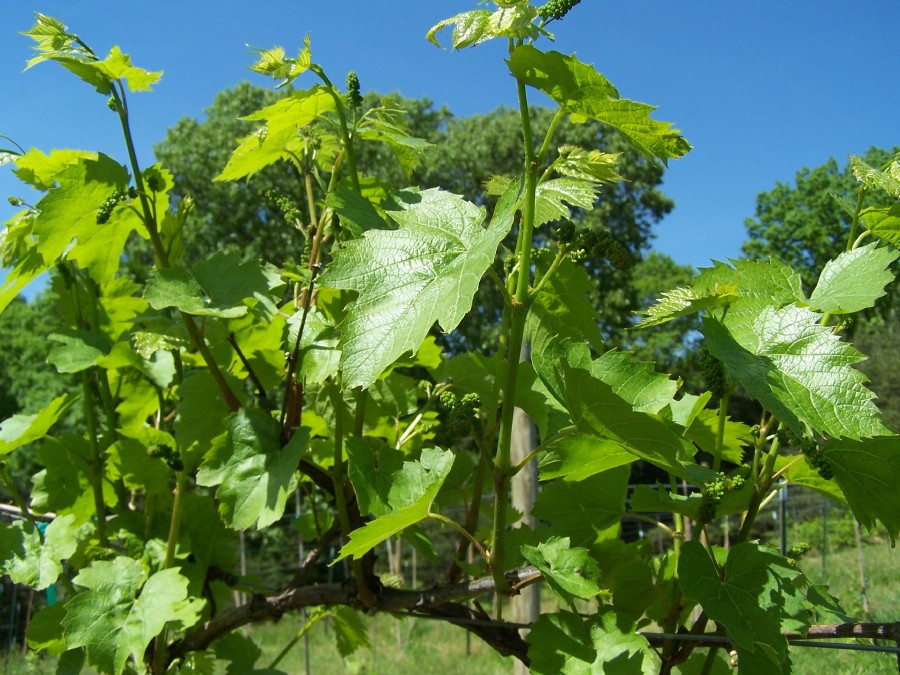
April showers have provided beautiful May growth on our grape vines, and weather permitting we will have these to sell at the Market at Silver Lake Farms later this year. Next year, we will provide the option to pick them here at our farm.

Enjoy these pictures!

Sommerset Seedless Grape

Sommerset Seedless Grape

Concord Grape

Concord Grape

Traminette Grape

Traminette Grape

St. Vincent Grape

St. Vincent Grape

Chambourcin Grape Cluster

Chambourcin Grape Cluster

Wild Grape

Wild Grape

More information on West Virginia wild grapes can be found HERE – WVDNR

Sauvignon Blanc

Sauvignon Blanc

Preparing for Spring

Snow is still in the forecast, but we are preparing for Spring! In one hoophouse, the Spring garlic has already been planted and little green shoots can be seen.

In the warmer Conservatory, we are watching some banana clusters mature. Hopefully they will be ready to eat soon. Tables and shelves are filled with seed trays with an assortment of vegetables that can withstand colder temperatures. We have been planting mesclun mixes, mizuna (a mustard), kohlrabi, assorted kales, beets, chard and more. With the lengthening days, the plants are eagerly growing.

Rajapuri Banana

conservatory 014

We are fortunate to be able to sell some of our produce at the Silver Lake Farm in Delray, WV. It may open as early as April this year. They carry quality locally grown fruits and vegetables including from their own farm, as well as many artisan products. Their lamb chops are outstanding.

Smoked Salmon and Charcuterie

We often have company, and naturally you want to put out your finest food for guests.  Going to the grocery store lately, though, has been depressing with the costs of foods escalating rapidly, and package sizes shrinking.  (By the way, the Commerce Department removed the cost of food from the cost of living index.)  When I calculate the cost per pound for favorites such as smoked salmon and proscuitto, or even more dificult to find German Lachs Schinken, they range around $25.00 a pound and up.  Not an option on this household budget!

When there’s a will there’s a way as the saying goes, and usually when I am faced with “you can’t” I find a way to respond with “who says?”  This approach has led to finding affordable solutions as long as I’m willing to do the research and the work.

I am going to share with you how to make gorgeous, moist, smoked salmon and provide a little background on charcuterie in general.

Smoked Salmon done in Umai Bag

Smoked Salmon done in Umai Bag

Charcuterie is a method of curing meat to extend its shelf life.  This was extremely necessary during times without electricity and refridgerators.  The flavors and textures that develop make it worth making even with modern conveniences.  The salt used to preserve the meat dehydrates the cells of the proteins, changing its flavor and enhancing or concentrating it.  It changes the texture of the meat akin to cooking it.  Thanks to a recent invention by Umai Dry (you can purchase a kit with this link), you can replicate this process at home with your own fridge – no need for a temperature and humidity controlled room or appliance.

Originally charcutierie was a process thought limited to pork products, but all sorts of meats and fish can be preserved using these methods.  A favorite is salmon.

This recipe is inspired by one from Umai Dry’s website.

Cure Mixture – This recipe makes extra which you can store in a jar.

2 cups Kosher or sea salt

2 cups organic sugar

2 teaspons black pepper

2 teaspoons dill

2 teaspoons garlic

1 teaspoon coriander seeds

1 bay leaf

Combine mixture.  I save extra mixture in a quart canning jar.

100_9903b

Buy an approximately 2 pound piece of salmon, wild caught is healthier, but use what is available that is very fresh.   Make sure you have its exact weight without wrapping/packaging materials.  Calculate half the weight, and weigh exactly that amount of cure mixture.

Leaving the skin on, rub the entire surface of the salmon flesh with a liberal amount of paprika.  Place the salmon in a durable plastic bag with a zip type closure, or you can do this in a flat glass dish with a good lid.  Pour the measured amount of cure mixture all over the salmon – both sides and rub it in gently.  Add a teaspoon of Liquid Smoke Seasoning.  Seal bag and place in fridge.

Each day, take bag and gently massage the salt cure around the salmon.  The salmon flesh should take on the extra red color from the paprika, and the salt cure will begin to extract fluid from the fish.  The salmon should be turned daily in this mix for seven days.  It will look like this.

Salmon in Salt Cure

Salmon in Salt Cure

On the seventh day, remove the salmon from the bag and rinse it in cold running water.  Pat it dry with paper towels.  Take an Umai Dry bag and wrinkle the top of it in order to help your vacuum sealer remove air.  Insert one of the Umai “mouses” (a white strip of plastic fabric) into the area where your vaccum will seal the bag.  Vacuum until the air has been removed and seal.  Move the bag slightly and seal a second time to insure a good seal.

Place your salmon filet on a cookie rack in your fridge.  Try to get several inches of air circulation under the cookie rack as well as above it.  I find that this rack from Wilton is ideal and does not take up much space in the fridge.

After 10-12 days in the fridge, take out of its Umai Dry bag, slice thin and enjoy!

I am presently experimenting with charcuterie methods for venison and various cuts of pork.  Stand by for progress on those cured meats!


Edible Weeds

I have been fortunate to meet special people, such as Eva Taylor of Ironwood farm who introduced me to permaculture.  Recently, I have gotten to know another amazing person, who has expanded my appreciation of nature and the garden, Leenie Hobbie.

Leenie and I share several mutual friends and I have often heard the statement, “you’ve got to meet Leenie Hobbie!”  She is a frequent guide for “Weed Walks” in our area, teaching people about the local flora and showing people how to identify edible plants. 

Fortunately, Leenie and I finally connected and we spent some time in my garden, which I admit is not entirely weed free.  Perhaps my German heritage makes me more fastidious about it than I need to be, but there were definitely  more than enough weed samples to be found.  I’ve always felt that their existence in my garden was a source of irritation, taking up precious space for my darling cultivated plants.  Until Leenie’s visit.

She quickly identified several edible varieties and even knew their nutrients and historic medicinal use.  She described how they could be used in cooking, and those loathsome plants suddenly turned into recipe potential!  Lambs quarters in quiche?  Sounds delicious!

Invader or Ingredient?

Invader or Ingredient?

Since her visit, we’ve gathered various types and even made “weed chips”  Collecting the leaves of a thorny vine called Greenbriar that Leenie showed me, we fried them in olive oil, producing a delightful crispy treat.  And I am willing to tolerate more weeds in my garden, and am even finding some favorite tasting ones, such as Purslane.

Leenie has a delightful and informational  blog, 3 Herb Mamas, that I encourage you to follow, and I am placing it on my list of favorite blog links.  She is also creating an Etsy store for her herb-based creams and salves, so stay posted for when that is launched!

Spring Harvest

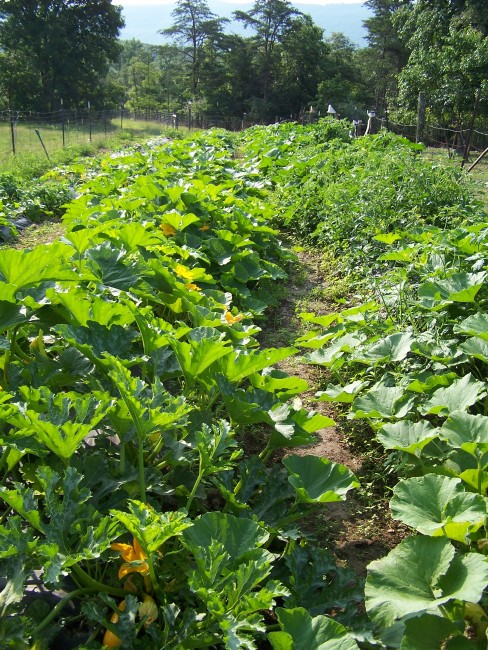
I had a wonderful day yesterday, planting and foraging in the garden, and enjoying the first substantial harvests for the year.  Yes, we’ve picked things here and there, some salads and herbs, but we are finally seeing the fruits of all our March, April and May labors, providing a June feast! 

100_9271b

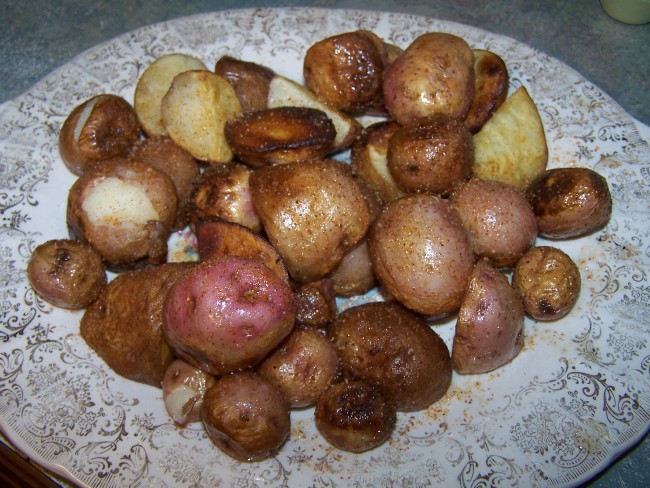
You may remember our post about growing potatoes in stackable boxes…yesterday I pulled the forms and found early spring potatoes.  They are crunchier when harvested freshly and become softer and creamier when cooked.    Here they are lightly boiled and then fried in Spectrum Organics Palm Oil Shortening.


Red Norland Spring Potatoes

Red Norland Spring Potatoes

The children enjoyed juice from the first batch of Nanking Bush Cherries.  Since the berries are difficult to pit, we boil them in water to release their juices, add a little organic sugar and the children pour this over ice cubes for a refreshing drink.  The additional benefit of Nanking Bush Cherries is that they make a wonderful edible shrub or privacy hedge :)

Picking Nanking Bush Cherries

Picking Nanking Bush Cherries

While we’ve already been enjoying the butter head lettuce Four Seasons, yesterday I harvested our first white Radicchio and they two combined made a delightful and completely non-bitter salad.  Four Seasons is showing off with its brilliant  red accents.

White Radicchio and Lettuce of Four Seasons

White Radicchio and Lettuce of Four Seasons

The Chicken is a broiler raised here on our farm.  It spent over six hours on the smoker yesterday with fresh herbs – thyme, sage and oregano – placed under its skin and in the cavity.   It makes a tender supper and amazing chicken salad. 

Smoked Chicken with Herbs

Smoked Chicken with Herbs

I hope these will encourage those who haven’t yet given gardening at try! 


Sustainable Seed Company Code!

june row garden


Go to this post for the newest code!  2015 Code!

Spring arrived late for most of us on the Eastern sideboard of the U.S., and our gardens have not progressed very far yet. So it may come as a surprise that it’s almost time for fall planting!

In Eliot Coleman’s excellent book Four Season Harvest (in our amazon store), he provides extensive charts for varieties of vegetables that are winter hardy and ideal for extending your growing and harvesting season. Additional charts show planting times for each vegetable – and guess what? We are only two weeks away from the first planting times for our zone! Uh oh!

First, take a look at the handy map on page 208 which shows the last frost date for your area, give or take a few days. For us, it shows October 10, but being on a southern exposure we tend to be a bit warmer. Going to Table 16 Planting Dates for an Extended Harvest on page 206 we scan across to the October 10 column and find that beans, beets, cabbage, and all sort of other plants should be planted in June for an extended harvest. Referring to the tables on page 94 shows that planting cold frame crops for fall and winter consumption starts in June as well.

Fortunately, the nice people over at Sustainable Seed Company can help. Once again, they are providing a discount code for Meduseld readers. You can get your root parsley, lettuce and swiss chard, radicchio, mache’ and cabbages from a trusted organic source.  Use the discount code Meduseld0614 (no spaces) for a ten percent discount off any order over $20.00!  Code is good until June 14, 2014.

And according to Theo Bill at Sustainable Seed Co… “Do you have any followers who are bigger growers?  I.e., might order a 1/4 lb. or more of things?  If so, perhaps you might  include a link to our bulk page?  We have over 750 varieties available in larger sizes for the larger gardens.  Don’t know, but if that’s the case, the bulk page is here:  http://sustainableseedco.com/bulk-heirloom-seed/  Otherwise, just the homepage (http://sustainableseedco.com) is good for a link.”


Meals at Meduseld – Rotisserie Chicken Recipe

This is a recipe for a very easy and flavorful chicken.

100_9133c

The first step is to make a marinade.  Blend:

1/2 cup olive oil

1/2 cup Balsamic Vinegar

1 teaspoon sea salt

1 heaping tablespoon Herbes de Provence

Opinion differs on the exact ingredients in an Herbes de Provence mix, but the one I use contains marjoram/oregano, lavender, rosemary, thyme and tarragon.

Place this mix in a large bowl, and marinate a large broiler chicken for several hours, turning and basting periodically so that all sides receive the marinade.

Truss the chicken with cotton string.  It is important to tie the wings and legs close to the body so that they do not move around on the rotisserie, causing it to go out of balance as it turns.

Place the chicken in the rotisserie and cook for 2-3 hours (depending on the size of your bird) at 400 degrees until done. 

I have a very basic West Bend model.  It does a superb job and even handles our large 6-7 lb chickens.


Meals at Meduseld – Easy Mayonnaise

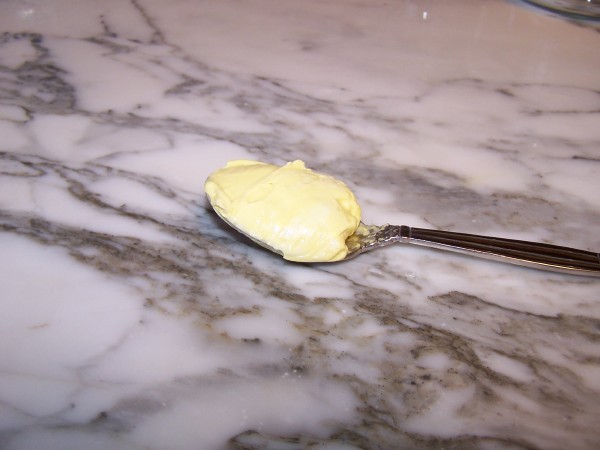
Thick, creamy mayonnaise

Thick, creamy mayonnaise

Making mayonnaise from scratch can be daunting.  The oil has to be incorporated very gradually into the eggs or it will separate.  I’ve avoided making it in the past because of the mess it would make with my blender.  Oil and eggs would spray all over the kitchen as I poured oil into the running blender.  What a mess!  It seemed to take more time to clean than to make the mayonnaise!

Recently, I decided I had to commit to making mayonnaise from scratch again.  The list of ingredients on the store brands, not to mention the exorbitant price, was enough to convince me to find a better way to make this delicious treat.  And did I ever find one!    A hand blender!

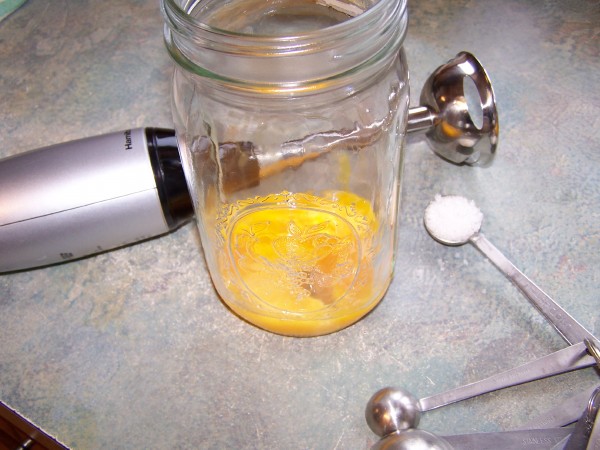
I have  an inexpensive Hamilton Beach hand blender (in Meduseld’s Amazon store) that I use for making Smokey Pumpkin Soup (recipe for that soon).  Using this nifty tool, you can make your mayonnaise in a wide mouth quart jar that can go straight in the refrigerator.  The only thing to clean is the hand blender attachment. 

100_8825b

First, the list of ingredients for a very basic, thick and creamy mayonnaise.  Then I’ll provide some variations.

In the bottom of the jar, place:

4 egg yolks (try to get local free-range eggs for freshness)

scant teaspoon salt

Blend these together briefly.

With the blender running, very slowly pour a trickle of one cup oil into the jar.  Oil options are: olive, sunflower, grape seed, and blends of these and other oils.  I do not recommend using soy since it can increase estrogen levels (http://americannutritionassociation.org/newsletter/whole-soy-story).   This is very serious for men!

As you pour in the oil, you will notice that the mix will start to get thicker.  When you have added all the oil, you should have a thick mayonnaise.  Now, add two tablespoons apple cider vinegar and blend.  Voila!  It’s that easy!

100_8826b

That is a very basic version, not unlike the brand Dukes.  It you want to add some flavor, you can mix one teaspoon mustard in with the eggs.  You can add seasonings such as herbs and garlic.  Or you can substitute half a freshly squeezed lemon for the vinegar.

Sustainable Seed Company – Discount Code

 UPDATE:  Sustainable Seed Co may be offering a new code!  Check for a new Blog Post February 2015!!!!!!!

Recently I wrote an article comparing seeds purchased from two different seed companies.  What proceeded was an interesting conversation with “Farmer John” of Sustainable Seed Company about seed dates, quality, and their commitment to their customers.  Not only did they offer to do everything in their power to make sure that I am content with their product and service, they want YOU to be happy too.

They are offering a ten-percent off code just for Meduseld blog readers!  Go the their website at sustainableseedco.com and use this code at checkout - Meduseld14 – no quotes and no spaces.  This code is good for readers of Meduseld’s blog only, and expires April 6, 2014.  Thanks much Farmer John for extending this offer!

While you are at their website, read up about their heirloom seed varieties and about their committment to sustainable agriculture.

Click here to go directly to their seed potato page!

And while we are discussing seeds, here is our own garden, which I have raked and trimmed, all prepared for planting.  First in will be onion sets, fava beans, and spinach.

Permaculture garden with key-hole beds ready for 2014 planting

Permaculture garden with key-hole beds ready for 2014 planting


Meals at Meduseld – Cinnamon Rolls

It’s only 10 degrees this morning, and forecasters are threatening us with another snow storm.  The best response seems to be to snuggle up with a good book and some cinnamon rolls.

Ingredients:

4 cups King Artur Artisan Bread flour

1 1/2 cup milk

2 eggs

1 cup sugar, divided

1 stick butter, divided

1 teaspoon vanilla

2 teaspoons yeast

1 heaping tablespoon cinnamon

1/4 teaspoon grated nutmeg


Combine flour, milk, eggs, half a stick of butter, 1/2 cup sugar, vanilla, and yeast to form dough.  I place all these ingredients in my bread machine on the dough cycle.  If doing by hand, I recommend combining the moist ingredients (melt butter gently) and blend into the dry ingredients.  Add flour is dough is still too sticky.

Allow to rise in a covered bowl until doubled in size.

Knead dough and let sit for 10-15 minutes.  Letting it rest will make it easier to roll out with a rolling-pin. 

Here I have rolled the dough out on a silicone matt which I highly recommend to everyone who bakes with any frequency.   Melt the remaining half stick of butter.  Add the remaining half cup of sugar, cinnamon, and nut meg.

100_7468b

Cut the rolled dough so that the swirls are exposed, in about 2/3 inch sections.

100_7469b

Place them in a flat baking pan and allow them to rise until doubled, again.  Bake in a preheated 400 degree oven for about 20 minutes.  When finished we often pour additional butter or honey over the rolls, but this is optional.  In my opinion, more butter is better :)

100_7470b