Archive | Gardening RSS feed for this section

Sustainable Seed Company Code!

june row garden


Go to this post for the newest code!  2015 Code!

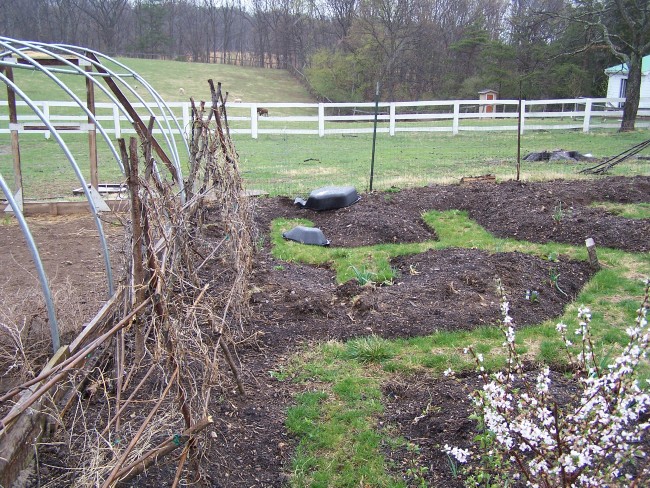
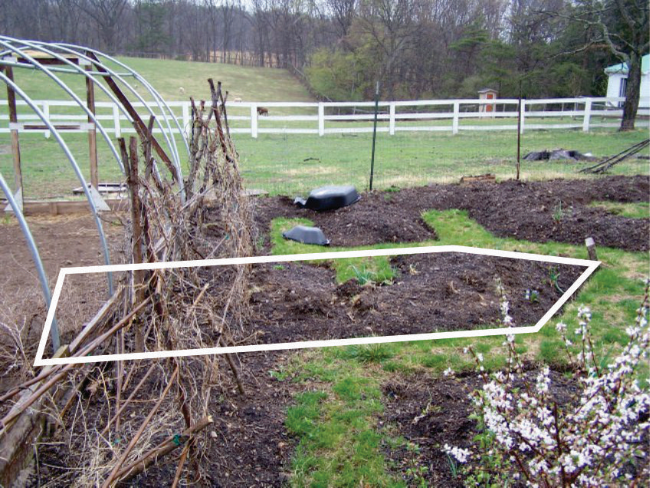
Spring arrived late for most of us on the Eastern sideboard of the U.S., and our gardens have not progressed very far yet. So it may come as a surprise that it’s almost time for fall planting!

In Eliot Coleman’s excellent book Four Season Harvest (in our amazon store), he provides extensive charts for varieties of vegetables that are winter hardy and ideal for extending your growing and harvesting season. Additional charts show planting times for each vegetable – and guess what? We are only two weeks away from the first planting times for our zone! Uh oh!

First, take a look at the handy map on page 208 which shows the last frost date for your area, give or take a few days. For us, it shows October 10, but being on a southern exposure we tend to be a bit warmer. Going to Table 16 Planting Dates for an Extended Harvest on page 206 we scan across to the October 10 column and find that beans, beets, cabbage, and all sort of other plants should be planted in June for an extended harvest. Referring to the tables on page 94 shows that planting cold frame crops for fall and winter consumption starts in June as well.

Fortunately, the nice people over at Sustainable Seed Company can help. Once again, they are providing a discount code for Meduseld readers. You can get your root parsley, lettuce and swiss chard, radicchio, mache’ and cabbages from a trusted organic source.  Use the discount code Meduseld0614 (no spaces) for a ten percent discount off any order over $20.00!  Code is good until June 14, 2014.

And according to Theo Bill at Sustainable Seed Co… “Do you have any followers who are bigger growers?  I.e., might order a 1/4 lb. or more of things?  If so, perhaps you might  include a link to our bulk page?  We have over 750 varieties available in larger sizes for the larger gardens.  Don’t know, but if that’s the case, the bulk page is here:  http://sustainableseedco.com/bulk-heirloom-seed/  Otherwise, just the homepage (http://sustainableseedco.com) is good for a link.”


Pond Question

I received a question about what we use in our pond to solve fish illnesses such as Ick and fungi.   Since the honey bees drink freely from this pond it is important to use products that are compatible with their health as well, and antibiotic-based “cures” don’t seem compatible.  Fortunately, I have found these all natural products for fish, and am putting them in our amazon store.  They are made with herbal extracts such as tea tree oil. 

100_9067b


Look closely, and you can see the honey bees drinking from the new pond, using the plants as little islands or “flotation devices.”

100_9069b

How to Create a Pond with Waterfall

Last week I shared my plans for adding to our permaculture garden, including installing a pond.  This weekend we got our project underway.  I am going to set out the steps for placing your own pond.  This will be a picture-intensive article, so it may take longer to load up.

Prepare your site by clearing it, and assess the area for soil conditions and how level or unlevel the ground is.  Our location is not level at all, and we are going to take advantage of this height change by creating a small waterfall effect at the upper end.  The upper layer of soil is not rocky, but below I quickly hit shale.  This is going to have to be removed with a pick and shovel.

Here I have started digging out the area in the approximate shape of the pond. 

100_8876b

Sloan is placing the pond form in the hole to mark areas that need to be dug.  Marking paint, available at hardware stores, is a very handy tool for this. 

100_8878b

This project became a family affair, with everyone clamoring to help dig.  If you look on the ground, you can make out the marking paint showing the areas that need to be dug deeper.

100_8881b

It is very important to keep returning the pond form to the hole and check it for accuracy of shape and being level.  Using a large level check how the pond lays in both directions.  A pond that is out of level will not hold as much water, and looks wrong.   If your level is not large enough to span the pond, you can use a 2×4 like this in order to verify the height on all sides of the pond.

100_8904b

It is a constant process of digging and checking.  Please don’t skip this step!

Dig a few inches deeper than you need in order to accommodate the pond.  This is so that you can place sand in the bottom of the hole.  You can also use “stone dust,” a fine crushed stone that is very stable.  Once again verify that your surface is level.


100_8913b

Now it’s time to permanently place the pond.  It is necessary to start filling it gradually before you backfill around the pond, otherwise the pond will rise out of the ground slightly as you fill dirt around it.  Here we have started filling with water, and Sloan is making final adjustments with the level before the pond becomes too heavy with water to shift anymore.

100_8915b


Now the entire pond edges have been back-filled and we can start placing the two cascade/waterfall “ponds.”  These will be set in concrete so that they do not shift.

100_8917b

We’d like to have a small cascade so that the water is aerated as it falls into the pond.  Using a Quickcrete mix, we begin to set the cascades.  Mix the concrete mix with water to the consistency of toothpaste and set the first cascade.  Make sure you check the level, and weight it with some stones or block so that it does not “heave” as the concrete sets.

100_8919b

Place some decorative stones around your base now.  Here we have placed the second level.

100_8921b

Now it is time to test the water pump.   I chose a pump from Lowes that is capable of pumping almost eight feet up.  While our cascade is not that tall, I did not want to use a smaller pump since I know this will be running 24/7. We’re testing to make sure the cascade is the way we want it, before the concrete dries!

100_8929b

Finally, the fun part – making the pond look like an element in nature by surrounding it with stones and plants.  You can place rocks around the edges, but we wanted to disguise the plastic edges of the pond somewhat and give the fish areas with cover.  You can see that the stones overlap the edges, making the pond blend in better and giving it a more authentic feel.  Here is the pond on the same day, now filled with water, plants even some goldfish!

100_8933b


If you’d like to have a pond like this installed, don’t hesitate to conttact our other compnay, Culver Design Build, Inc.  We’d be glad to help creat a bit of paradise in your yard.

Garden Expansion 2014

Undaunted by the 26 degree temperatures for last night, I sat and drew out plans for the  garden expansion.

We have two hoop houses near the house, and they have served the rotation of winter plants, chickens and this spring, bottle lambs.  The hoop house that bordered the garden has been my source of winter herbs.  I had an enormous rosemary plant, lemon thyme and sage that I could enjoy all winter.  Until this brutal winter at least, when even under their protection the plants succumbed to the bitter cold.

I have decided to relocate that hoop house and add that area to the existing permaculture garden.  The family enjoys this garden so much, and its maintenance is so easy, that expanding it seems like a wonderful way to add to it, diversify the plants even further, and add some movement to it – the movement is water!  A pond with a waterfall!  Hopefully, this will bring more birds and frogs, which will help with insect populations.  The garden has also become so enjoyable that we want a place where we can sit and appreciate it.

It’s best to put ideas into a plan, so with glass of wine in one hand and pen in the other, I sat last night and started drawing.  This sketch is not to scale, but you can recognize the maze-like elements of the existing garden.  The goal is to add growing area for plants, a pond, and a sitting area.  It would also be a plus to add a small tool shed. 

pondsketchb

Here is a picture of the garden edge with the hoop house being dismantled.  You can see the abrupt end and the bean stakes from last year.  we are going to move these and extend the path.  Here is the current state, and in the next picture I have marked the approximate area where we will place the future pond.  A pond is not merely ornamental.  It provides water for bees and birds.  It also becomes the place for mosquitoes to place their larvae, which are promptly eaten by foraging Koi and goldfish.  Despite living in a very remote location with several ponds, we have no mosquitoes!

100_8875b


The stone at the right tip is "Point A" for reference

The stone at the right tip is “Point A” for reference


The garden slopes gradually downhill, which is perfect in order to make a cascading waterfall.

Here is the inside of the hoop house as it is being taken apart. 

100_8874b

You can make out the remains of some of the herbs that were destroyed by the excessively cold winter.  This will all be incorporated into the garden.  The middle of this hoop house will become a small patio for a bistro set.

We have selected our pond and it is on hold at Lowes.  Here is a link to it.  Pond Liner  It is a large, 270 gallon capacity pond.  Its dimensions are approximately 7’x7′, which should fit neatly into the area I have designated for it.


pondliner

Surrounding the pond will be perennial vegetables such as asparagus (they have lovely ferns most of the year) and rhubarb, which some would actually call a fruit.  I will also transplant banana trees from the conservatory each year to give the sitting area a tropical feel as well as some shade. 

I will keep you posted on the progress with photos and instructions, especially for seating the pond liner correctly, and for installing the waterfall/cascade effect.


Early Signs of Spring

Spring is still dawdling although there are encouraging signs.  A hint of green is showing itself in the lawn and pastures, and buds are forming on fruit trees. 

Buds forming on apple tree

Buds forming on apple tree

Last night we enjoyed the delightful sound of tree frogs around the pond.  Get close to that pond at your own peril, though!  The geese have made their nests and do not welcome intruders!

Inside the conservatory Spring is well advanced.  Small vegetables are already forming.  We have selected parthenocarpic (self-pollinating) varieties so that we do not need a pollinator.

Zephyr Zucchini

Zephyr Zucchini

Some vegetables, such as beans, do not need a pollinator either.  Here are some pole beans in a hanging basket, ready to be harvested.

Assorted pole beans

Assorted pole beans

The Jabuticaba berries have grown so quickly you can see the change overnight.   These were not pollinated either, showing me that they will do well in the greenhouse environment, and I won’t have to pollinate these by hand with a small paint brush.

Jabuticaba berries

Jabuticaba berries

My gardenia bush normally blooms right around Easter.  Since Easter is late this year, these beauties are already in full bloom before the holiday, filling the conservatory with its sweet fragrance.

Gardenia

Gardenia

And, our experiment with growing potatoes indoors in stacking boxes is going rather well.  Here, we are already on the third layer, and the plants are still reaching up.  Since they have not set blossoms yet, I hope they are still putting out additional tuber shoots.

Potatoes in stackable boxes

Potatoes in stackable boxes

There are only two more days to use Meduseld’s exclusive discount at Sustainable Seed Company.  Remember to use Meduseld14 at checkout to get ten percent off your order!


Sustainable Seed Company – Discount Code

 UPDATE:  Sustainable Seed Co may be offering a new code!  Check for a new Blog Post February 2015!!!!!!!

Recently I wrote an article comparing seeds purchased from two different seed companies.  What proceeded was an interesting conversation with “Farmer John” of Sustainable Seed Company about seed dates, quality, and their commitment to their customers.  Not only did they offer to do everything in their power to make sure that I am content with their product and service, they want YOU to be happy too.

They are offering a ten-percent off code just for Meduseld blog readers!  Go the their website at sustainableseedco.com and use this code at checkout - Meduseld14 – no quotes and no spaces.  This code is good for readers of Meduseld’s blog only, and expires April 6, 2014.  Thanks much Farmer John for extending this offer!

While you are at their website, read up about their heirloom seed varieties and about their committment to sustainable agriculture.

Click here to go directly to their seed potato page!

And while we are discussing seeds, here is our own garden, which I have raked and trimmed, all prepared for planting.  First in will be onion sets, fava beans, and spinach.

Permaculture garden with key-hole beds ready for 2014 planting

Permaculture garden with key-hole beds ready for 2014 planting


Growing Potatoes in Stackable Boxes

Potatoes are one of the easiest and most versatile vegetables to grow.  Even apartment dwellers can grow them if you have a balcony with several hours of sunlight.  They can also be grown in greenhouses, high tunnels, or even an enclosed porch, allowing you to harvest delicious potatoes year-around.

We used to only grow these in our garden, but have discovered how little space several plants can take if you use a stackable system.  Several options include using old tires, trash bins with drilled holes for drainage, or wooden stackable boxes. 

We prefer not to use tires due to the chemicals and petroleum product residues that can leach into food – and the same goes with plastic tubs and containers.  I saw a picture recently of someone planting lettuce directly in a plastic Miracle Grow soil bag, and it seems to defeat the point of growing something yourself.

You can buy stackable boxes and raised beds from garden centers, but these can be exorbitantly priced.  We have solved this with inexpensive and durable rough sawn oak boards.  You can make these boxes with any untreated wood from the hardware store.  Please don’t make the boxes out of pressure treated boards, that will also leach chemicals into your soil.

Take the boards and cut them into equal lengths – approximately 2 feet long makes a good-sized box.  If you have a dirt floor to grow this on, you won’t need a bottom, otherwise, cut a piece of plywood to fit your dimensions.  Make extra bottomless boxes in the same dimensions.  These will be your sides as your plants grow. 

We mix a soil mixture of approximately one-third top soil, one-third compost, and one-third seed starter mix with lots of peat.   Potatoes don’t like to grow in hard soil, so the peat mix makes the soil considerably more lofty.

Take seed potatoes, or even store potatoes that are beginning to sprout.  Don’t use potatoes from the store that are not sprouting since they may have been sprayed with a substance that will prevent them from sprouting.  These will never grow.  You can order seed potatoes.  Buying organic ones is also a good option.  Buy late season potatoes since they will continue to send out new potato shoots throughout the growing season!

Plant the potatoes in the lowest layer and cover with soil.  Before long, you should see potato plants pushing through the dirt.  Keep them evenly watered but not soggy.  As they grow.  Add anther wooden “box” and start building the soil around the base of the plants always leaving a portion of the plants exposed for photosynthesis.

100_8686

These potato plants have pushed up through their second layer and are now ready for a third box.  As they grow, they will put out extra roots that will form potatoes, filling the box as it grows taller.

You can start harvesting the potatoes when the plants have bloomed.  This is the baby potato stage.  If you want larger potatoes, wait another month or two.

Jabuticaba

Exciting news in the conservatory!  First jabuticaba blossoms starting to push out!  These are the small greenish white “nubs” you can see on the branches below.


Jabuticaba

Jabuticaba

Jabuticaba is an unusual tree in that it bears its dark purple grape sized fruits on its trunk and stems.  The tree is native to Brazil and attempts to naturalize it in warmer regions of this country have failed.  It is excellent fresh, and can also be used for wine and jams.  There are even claims of cancer fighting properties in the fruits.  The tree has a graceful shape that can that be trained as bonsai, and the leaves are similar to the olive leaves.

Elsewhere in the conservatory, the orange tree has a few lingering blossoms, but look at what’s next; Gardenia!

Gardenia buds forming

Gardenia buds forming

And while the hibiscus does not have a fragrance like the oranges and the gardenia, it is stunning none-the-less. 

Hibiscus

Hibiscus

Frugal Tip – Plant Tags

When starting seeds trays, it is very important to label the seeds.  This is especially true with plants like cucumbers that have different picking requirements – some need to be picked small or they turn bitter, others can be left to grow long.  A “Paris Pickling” needs to be picked at gherkin size, and a “Bella” at ten inches.  How can you tell this looking at a vine?  Sometimes you can’t.  This is just an example.

Identify your seedlings

Identify your seedlings

You can solve this frugally by reusing your sour cream and cottage cheese containers.  We are very fond of Daisy sour cream and cottage cheese because they use no fillers or stabilizers or anything that you can’t pronounce.   With a large family, we eat a considerable amount of these weekly.  While many of the tubs are used over and over for leftovers and my husband’s lunches, we still end up with stacks of them that I am reluctant to throw away.

So I have found another use for them.  Using sharp scissors, I cut the base off about 1/2 inch up from the base.  This forms a little “dish” that you can use as a tray under small pots.  With the remaining sides, I cut strips just wide enough to write on with a permanent marker.  If you have seen the cost of plant markers in nurseries and gardening catalogs, you will see that your savings can be substantial.  When I am done using them, I put them all in a pot and often reuse them.

Frugal Plant Labels

Frugal Plant Labels


Happy Gardening!

Daisy Plants Labels

Daisy Plants Labels

Conservatory Status

While we got seven inches of snow yesterday, it still looks and feels like paradise in the conservatory.  The plants have also noticed the lengthening days, and are starting to prepare for the new growing season.

100_8504b

 The geraniums, while still green, were in a semi dormant state.  Now they have burst into bloom.

100_8505b

The fig tree is pushing out new leaves, and has already started forming fruits.

100_8506b

We have started the geranium cuttings for the summer window boxes.

100_8507b

Seeds are off to a good start, at least the ones spared by the mouse.

100_8508b

I wish this photo were “scratch and sniff.”  The orange blossoms have released a heavenly scent that fills the entire conservatory.

100_8510b

A yellow pear tomato hiding in the foliage.

I have received some questions about our conservatory.  It was built by my husband.  His company builds these and new homes in the Northern Virginia and West Virginia Panhandle.  You can see some of his work here!