Archive | Food RSS feed for this section

Plea to Farmers

I went to high school in the beautiful state of Iowa.  From the meandering Mississippi to the fields of wheat and corn that stretched beyond sight, it was also inhabited by some of the nicest people you’d ever want to meet.   I remember in the fall students returning to school  as brown as nuts.  These students had spent the summer detassling corn, a process where the tassle is removed to prevent pollination.  Thousands of Iowan acres were detassled by hand and the students were glad for the income. 

The detassling was done for hybridizing corn.  The tassles of most corn are removed while the pollinator rows are left intact.  This creates the hybridized, higher yielding corn.

Fast forward to present day.   Instead of relying solely on the genes present in the corn, corporations have inserted genes for certain traits into the plants and we call them genetically modified organism, or GMOs.

Over and over I read and hear proponents of GMO’s stating that with population growth GMO’s are necessary to feed the world.  While I disagree with the logic of a statement that says  “the undesirable should be accepted in lieu of something worse,” I am going to give the first statement the benefit of the doubt and test it, and see if it stands up to logic.

A casual glance at the research shows that forty percent (MSN Statistics)  of U.S. corn is used to make ethanol.   So 40 % of each years’ crop isn’t feeding anyone.  People are dying of starvation all over this planet, and here we literally burn food to fuel our cars.   When almost half of the corn produced is literally burnt, the feeding the world argument falls apart.

BTW, Ethanol is very hard on automobile engines that were not created to handle it.  It burns at a higher temperature, decreases fuel efficiency, and destroys the plastic fuel intakes on fuel pumps – very expensive indeed.  And even the EPA admits that it is worse for the environment than its gasoline counterpart.   Despite this, evidently the EPA has signed off on increasing the blend allowed from 10% to 15%.  Google what this will do to your engines.   It’s especially frightening when you consider examples from mechanics that gas companies are already sneaking in higher levels of ethanol.  Here’s what Consumer Reports says about the matter.

So, the single biggest argument for using GM crops falls short.  Here are the ones against its use, and they are substantial. I ask readers, especially those who farm with GM crops to please consider:

  • GM corn has been proven to cause cancer in rats and mice at levels that are allowed in drinking water. 


  • GM crops treated with glyphosphate cause disease, from diabetes to obesity to heart conditions.  This may sound like a stretch, until you see the explanation of Dr. Stephanie Seneff, MIT researcher.  Monsanto claims glyphosphate, the active ingredient in Roundup (c)  is harmless to humans since it affects the Shikimate pathway of plants.  Since human cells do not have this pathway, they claim it is harmless.  As Dr. Seneff points out, however, the human gut bacteria outnumber our human cells in our bodies 10 to 1.  It is estimated that each human carries 10 billion bacteria cells, each of which DOES have the Shikimate pathway.  When our intestinal balance is destroyed, Seneff shows that other health problems emerge. 


  • GM crops creates monopolies.  Imagine all the worlds major crop seeds in the hands of a few corporations.  Nuf said.


  • GM crops are weakening U.S. exports.  Recently, India announced that it would be buying GM free soy beans from Brazil.  Personally, I love Brazil, but I am sad that crops that used to be the strength of this nation are being lost.  I was born in Decatur, IL while it was crowned “the Soybean Capital of the World,” and it is about to lose that crown, if it hasn’t already.   I remember as a little girl driving over a large bridge that went through Decatur past the Staley’s plant.  We called it Staley’s bridge, because the smell of the soy processing was so overpowering we had to warn each other to plug our noses.   Well, many countries don’t want our GM products, including Japan who just cancelled a large wheat order when the story emerged last week of rouge GM wheat found in an Oregon field, as described here by The Wall Street Journal.  Korea and Taiwan and considering their U.S. imports as well.

wake up gm


 This is a nation built of hard workers.  People who took great risks, leaving foreign lands and families to build a better place.  Farmers in this country are the embodiment of the virtues that built this nation – hard-working and self-sacrificing.  It is such a shame to watch their international markets shrivel.  Now more than ever it is important to look at why other countries have banned GM products and to turn the tide before all confidence is lost internationally in our ability to produce safe, delicious and nutritious food.  This country was the bread basket of the world.   Please think about it!


Stowell's Evergreen Open Pollinated Growing in Meduseld Garden

Stowell’s Evergreen Open Pollinated Growing in Meduseld Garden


Disappearing Bees

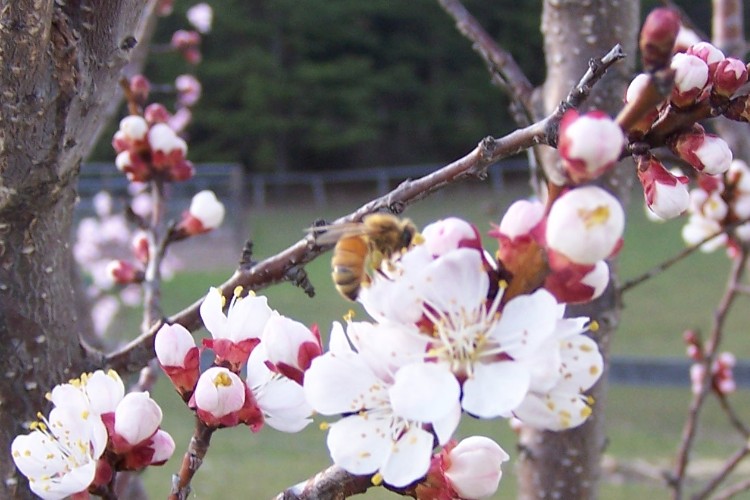
Dr. Mercola covers the problem of colony collaspe disorder (CCD) and its impact on the almond industry in California this spring.  In his thought-provoking article, he reminds people about the necessity of bees in the world’s food supply and draws attention to the dire consequences if we do not find ways to protect the bees.  Please take a moment to read Dr. Mercola’s article.

Honey bee on Hady Almond at Meduseld

Honey bee on Hardy Almond at Meduseld

Meals at Meduseld – Rose Petal Jelly

Rose Angel in Garden

Angel enjoying the shade of David Austin Rose “William Shakespeare.”

While there is so much work to do, the distractions of the garden are so tempting.  Only a few weeks ago, most of the landscape was starting to green up, and now the roses have exploded in bursts of color and fragrance.

Many of the roses here are David Austin Roses that I have selected for their old world appearance and fragrance, especially next to the front porch where we can enjoy their decadent scent.  A small Carolina Wren couple has made a nest in the tree rose and the babies are almost ready to fledge.  It’s easy to forget trials in so much beauty.  What work?


rosemontage

Since we do not use pesticides on our roses, they are available to eat as well.  A few petals are so lovely and delicious tossed into a salad.  Today, however, I am going to demonstrate how to make Rose Petal Jelly.

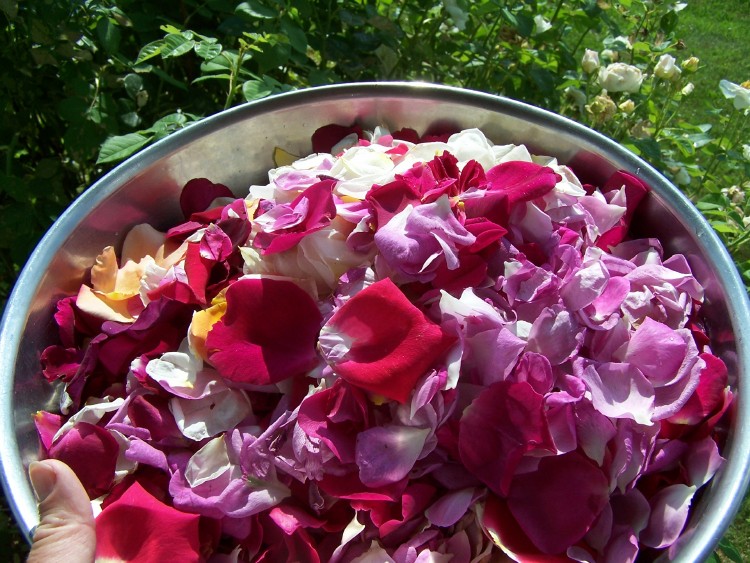
Using a  large stainless bowl, gather petals from your pesticide-free garden.  I don’t recommend using sprayed petals.  Here I picked an assortment from the garden, filling the 13 inch bowl.

rosepetalsbowl

If you’d like the deep red color to you jelly, concentrate on getting fuchsia, red and burgundy roses.   Our white roses are the most fragrant and so I add lots of those for flavor.

Rinse rose petals in a sieve and place them in a large pot.  Fill the pot with water to cover.  I have used approximately 13-14 cups.   Bring these to a boil stirring often since the roses petals will want to float at the surface at first.  Boil until they have lost their bright hue and most of the color and scent has transferred to the water – approximately 10-15 minutes.   The darker petals will give up most of their color, appearing pale like this below.

rosepetalsboiling

I have decided I’d like a darker color so I added more dark petals after this photo, bring the water back to a boil to extract their color.

Add the juice of two lemons.  You will notice the juice livens up the color of the water, brightening it.  The acid from the lemons will be necessary for the pectin to work.

Pour the petals and water through a jelly bag strainer.  For convenience, I am placing one in my Amazon store, along with some other items you may need for canning such as my favorite Italian and German canning jars. 

rose jelly bag

Now, measure your liquid back into a pot.  For every cup of liquid, I will use one cup of sugar.  Sounds like a lot, but its standard.  This is one of the few times I use refined white sugar, since it won’t change the color of the jelly.    Bring the rose liquid and sugar to a solid rolling boil.  I will hold it here until it reaches 216-217 on a jelly thermometer.

Here, I add pectin according to the instructions on the pectin, which I bought bulk from the local Amish store.  Please read the instructions on your box, because some differ.  In my case it calls for approximately 3 tablespoons per 3 3/4 cup liquid.    I bring the mix back to a rolling boil for just over a minute, until I can discern the change in texture on my stainless spoon.  When it is ready, it will start becoming solid on the spoon. 

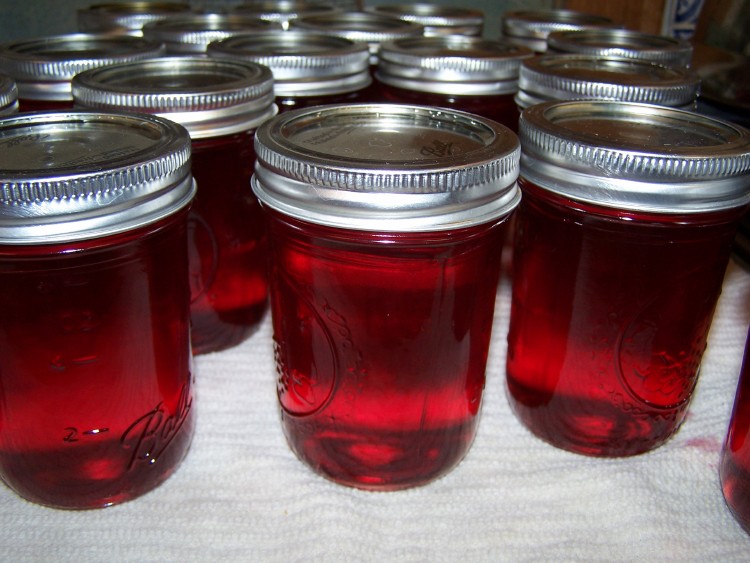
Ladle into sterilized jars.  Seal according to instructions of the canning jar/lid combination you are using.  Process for five minutes in a boiling water bath, and let them cool on your counter.   Enjoy its beautiful color and delicate flavor on toast, English muffins or scones. 

rose jelly done

Madness

One definition frequently given of insanity is to do the same thing over and over and expect a different result.  We have a fine example of that in the genetical engineering corporations, who push their GMO seeds and products on farmers worldwide.  These farmers are given the promise of better yields and higher profits.  The reality is that these products increase the use of herbicides and pesticides.  It has caused such significant problems in India that there is a crisis of cotton farmers committing suicide, and that is worth an article of its own.  Additionally, Vandana Shiva states in a BBC Interview that a “billion people go hungry because of GMO farming.”

But the problems with GMO crops are not just with the agricultural and toxin issues, it also has to do with what these feeds do in human and animal bodies.  I have already attached videos from Dr. Don Huber who is an expert on glyphosate (commonly known as “Roundup”) who has written and testified frequently on the grevious problems caused by glyphosate ready crops.  I have also provided links to a GreenMedInfo article showing the cancerous tumors that developed in rats fed GMO corn. 

The latest in the craziness is now emerging.  Researchers have now altered the genetic structure of wheat so that it “silences” how the wheat handles carbohydrates.  My guess is that someone is trying to produce a lower carb wheat to satisfy the trend for lower carb diets.  However, there is reason to believe that this gene alteration can be absorbed by human bodies, silencing how the body can handle and store carbohydrates.  Here is a video provided on GreenMedInfo’s website called GMO molecules May Silence Hundreds of Human Genes.  It is only 4 minutes long and certainly worth the time to understand the ramifications of dabbling in GMOs.

Please share this blog with as many people as possible since the GMO issue has been obscured by special interests.  This article provides many helpful links in one place that cover the madness.

Permaculture at Work

The last month has been rather hectic, not affording much time for working in the hoop houses, certainly not as much as I have in the past.  Yesterday, being one of the first really gloriously beautiful days of the spring, I went out to work in the poor neglected hoop houses and take stock of the situation.

My oh my oh my.

Hoophouse Chard


Here the chard is doing tolerably, but I have allowed the weeds on each side to go to seed.

 The stunted kale is starting to bolt from the heat, and it is also surrounded by weeds that have developed seed heads.  On its right, you can see bolted lettuces.   I also found aphids on the carrot top greens.

So here is the  option I am faced with – weeding this entire thirty foot hoophouse, and distribute lots of seed heads as I do it.  But I really don’t want to do that.  The seeds I leave will sprout, and in pulling the weeds, it will take a great deal of the valuable dirt we have built up.  Aha!  The next option – chickens! 

I went directly to the computer and pulled up McMurray Hatchery’s website, a large-scale chicken hatchery that operates out of Iowa.  They ship day-old chicks all over the continental United States and these adorable little peeps come straight to the post office.  I was very fortunate yesterday – when I went to the broiler chick page, it stated that the April 22 shipment date had a very limited quantity available.  The next ship date would not be until June!  Too long for the hoophouse to wait.  I picked up the phone and got a representative who took my order for 25 chicks for the April 22 date.  I clicked refresh on my computer – and the April 22 date disappeared from their options.  I had gotten their last 25 chicks for that day.

So for the next several days we will eat out the chard and other edibles in the hoop house, and by the time the chicks arrive everything left will be for their consumption, including the aphids on the carrots.  So this is the beauty of permaculture.  It is literally labor-saving, as the chicks will do my work of removing delectable weed seed heads.  The chickens will consume the slugs and other insects, and will feast on luscious bolting greens.  These chicks won’t be contained in a small space – they will literally have 408 square feet of greens-filled space .  This, in addition to their organic diet from Countryside, will provide a well-rounded diet and create nutritious birds not raised on soy and GMOs.  Even this is a win-win situation, since I will be able to coordinate with Eva of Ironwood Farm on the Countryside delivery, and we can save some gas (it’s my turn).  Eva is currently raising some chicks and you can read about her adventure here.

And 6-8 weeks from now, I’ll have a perfectly clean hoop house.  By mid-June  that hoop house will again be available for planting with cucumbers, melons, tomatoes and other plants that can withstand the heat and actually thrive in it.   And I won’t have done any of it :)  Permaculture.


Dangers of Commerical Fish “Farms”

In this article, Dr. Joseph Mercola discusses a documentary that reveals the problems with commerical fish operations.  It confirms what he was warned consumers about for years – that these operations are not good for either the fish or humans, that they destroy the environment, and that government agencies charged with protecting the public are actually complicit in covering up the damage.  Please take a moment to go to Dr. Mercola’s article with embedded video here.

Meals at Meduseld – Bruschetta

Yesterday afternoon we were chatting on the phone with our Uncle Dick.  Uncle Dick always has sage advice, and his advice yesterday was to go do something fun.  On the spot, we decided to make some Bruschetta and have a glass of red wine.  So, this recipe is in your honor, Uncle Dick!

Bruschetta

This is easy to make and so much fun to eat.  It also makes terrific Lent food, if you are looking for meat-free recipes.

Ingredients:

Bread – we used our basic bread recipe but switched some spelt flour with the white and made baguettes

olive oil or cooking grease of your choice

4 large tomatoes – diced finely

2 heaping tablespoons pesto

medium onion – diced finely

cilantro – chopped

1/4 cup balsamic vinegar

parmesian or romano cheese – grated

salt and pepper to taste

Slice the bread thinly and toast in a skillet with olive oil or fat of your choice.  We used lard and our wrought iron skillet.  Toast both sides until golden-brown.

Toasting Bread


Combine all the remaining ingredients except for the grated cheese.  We made the pesto here with basil we grew last year and it keeps very well in the freezer.  Our pesto contains garlic, so it’s not listed as a separate ingredient. 

The cilantro is still growing fresh in our hoophouses, where it has withstood 11 degree (f) nights, and still managed to grow a bit.  We keep all sorts of herbs in one of the hoop houses and its such a pleasure to pluck fresh rosemary and thyme in the middle of winter.

Bruschetta Topping

Spread this heavenly topping on each piece of bread, top with grated cheese and serve!  We never have left-overs.

Meals at Meduseld – Bread and Pizza

I recently stayed at my friend Barbara’s wonderful Bed and Breakfast in Longdale Furnace, Virginia called the Firmstone Manor.   It is a beautiful pre-victorian manor and she always makes me feel at home.  While I was there, I was supposed to give a lesson in bread making, but the threat of snow on the roads forced me to come home early.  So, I am going to cover some bread making basics, and transition it to pizza, one of the easiest and most delicious foods to make.  Since it is Lent, I am providing a vegetarian version as well.  

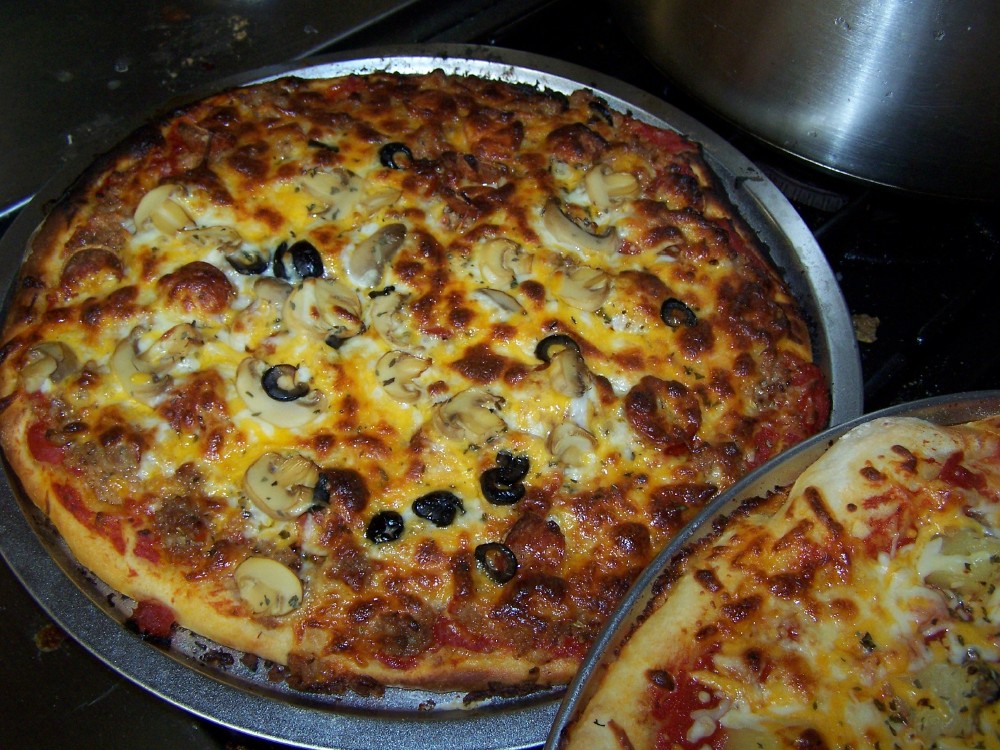
Sausage Pizza

Sausage Pizza

 Basic Bread Recipe

2 cups warm water

2 teaspoons salt

2 tablesoons sugar

4 level cups King Arthur Bread Flour

2 teaspoons yeast (I use Fleischmanns Instant Yeast in one pound packages )

I like to take all the above ingredients and stir them in a food grade bucket that I have left over from some coconut oil I ordered from Radiant Life Catalog.  I put this bucket of stirred dough in the fridge and let it sit a couple of days.  If you double the recipe, you can just grab a chunk of dough for rolls, bread, etc.  whenever you need it.  As it sits, the flavor improves, becoming more like a sour dough.

doughbucket

An extremely important note:  Do NOT use tap water for baking bread.  The chlorine in the water will kill the yeast cells and your bread will not rise.  I know alot of city dwellers who have said they cannot bake bread, but its the water’s fault, not theirs.  I don’t recommend distilled water either because it has no remaining minerals.   Try a spring or mineral water (not carbonated).  We use well water and always have good results.

Take your dough and let it come back to room temperature.  It will start to rise.  Knead in additional flour if it is too sticky, otherwise you can start shaping the dough into the bread style you need.  The first picture below is how the dough looks straight from the bucket.  The second picture shows how it looks after it has been kneaded.

Dough from Bucket

Dough from Bucket

Kneaded Dough

Shape the dough.  Here I am going to make it into baguettes and sandwich loaves.  Let it rise until doubled.

Baguette - Slash the dough so it can rise.

Baguette – Slash the dough so it can rise.

In 400 degree oven, bake bread for about 1/2 hour until golden brown.  I start with convection for the first five minutes.  This is optional but does give an extra “puff.” to make the loaf rise more. 

Finished Loaves

Finished Loaves

Now, say you want to make pizza instead of bread?  Easy.  Each recipe I gave above will yield two loaves, or two large pizzas.  And I don’t mean those weeny things they call a large pizza now-a-days.  Sorry y’all but a twelve inch pizza isn’t “large.” 

Take an appropriately sized piece of dough and roll it out flat with a rolling pin and plenty flour.  If you look at my dough baguette picture above you can see that I have a silicon rolling mat.  I strongly recommend one, and a benefit to these is that they have markings to show how large you have rolled your dough out. 

I place my rolled out dough on a pizza pan that I have covered first with a small amount of olive oil and a sprinkle of salt.  This makes the crust more flavorful.  Now start with your toppings.  We use Muir Glen chopped tomatoes as our sauce, but I am in the market for a new brand since they gave money to the side opposing GMO labeling in California.  If I am wrong, please correct me.  In the picture below is a ham and pineapple pizza.  Cover with generous amounts of shredded cheese, and allow your pizzas to stand for fifteen minutes for the yeast to rise. 

Bake at 400 for ten minutes and then reduce temperature to 375.  Bake another approximately 20 minutes until cheese is a golden brown and center is cooked.

For a delightful vegetarian pizza, we omit the tomato sauce, using instead this delightful Roland Truffle Cream – I put it in my Amazon store.  Spread about one tablespoon over a medium (12 inch) pizza.

Roland Truffle Cream

Roland Truffle Cream

In a small pan cook sliced onions and bulb fennel with water until almost tender.  Drain well and spread on pizza dough.  Cover with generous amount of shredded cheese and proceed with directions for pizza above.  Yum.  Truffle. 

Note to pizzerias:  This is a LARGE pizza.

A True Large Pizza

A True Large Pizza


Rendering Lard

Waste not, want not.  Timeless advice we adhere to.  In this case, we have purchased a butchered pig from our butcher.  We are using the layers of fat next to the skin and throughout in order to render it into lard for cooking for the next several months.  This also makes it possible to use everything except the oink.

We had a lovely snowy day, and the large soft flakes made the world look like a giant snowglobe.

 snowglobe

We learned to render lard about fifteen years ago from neighbors we had at a previous farm.  They were true locals having been born and raised in that area.  When we first met them their farm did not have an indoor bathroom and they used the outhouse.  They butchered several hogs each year, and cured their own meat in a curing shed built specifically for that purpose.  It was an incredible learning experience, to help them on butchering day, and the camaraderie and joviality of the day always made it something to look forward to.

It may be difficult for some to see this the same way, and I understand.  However, one thing that stood out to me was that in these old-fashioned butcherings, there was absolutely no waste.   From the head, which they boiled to make Head Cheese, all the way to the tail which went in the lard rendering, every portion of the animal was used. 

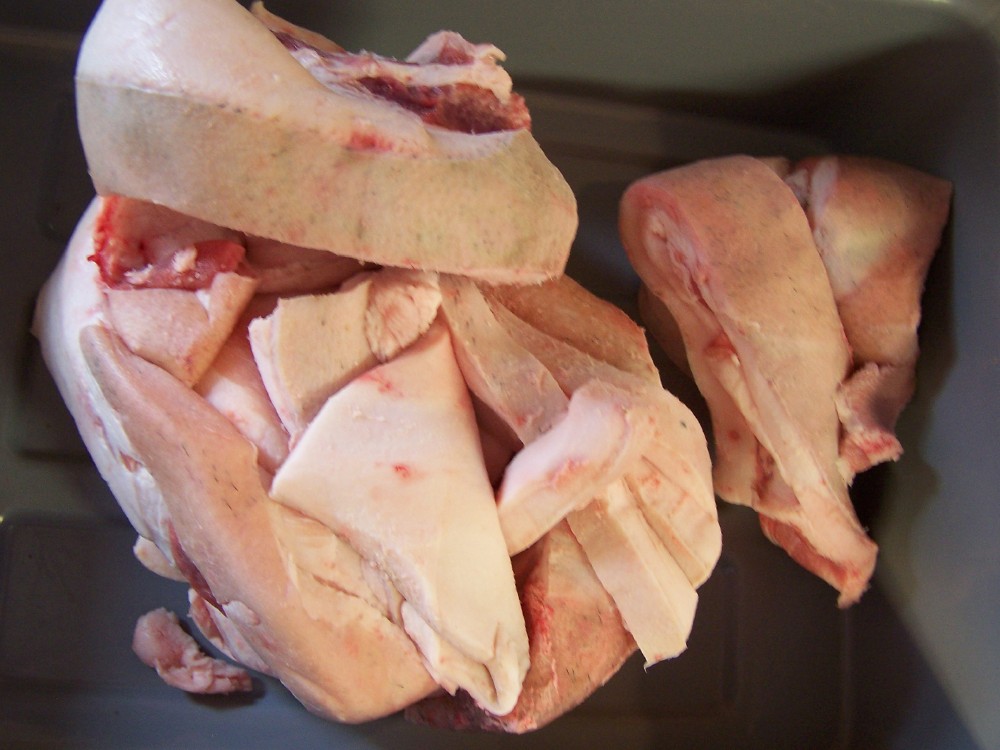
It is a good idea to do the cooking outside, since boiling fat can generate a lot of splattering grease.  But we are going to start indoors in order to cut the meat.  We are starting with the pork scraps provided by the butcher.  In addition to all the nice cuts of meat and sausage, we also received all the belly fat and skin pieces, which have lots of fat attached to them.  Those are the parts you can buy in the grocery store as “pork rinds” those fluffy salty bits of pork.  These scraps have a long way to go to look like that.

pork scraps


The smaller you cut the pieces, the faster and more thoroughly they will render.   We cut them into approximately one-inch (2.25 cm) pieces.   The fat is easiest to cut if it is still quite cold and firm. 


pork diced


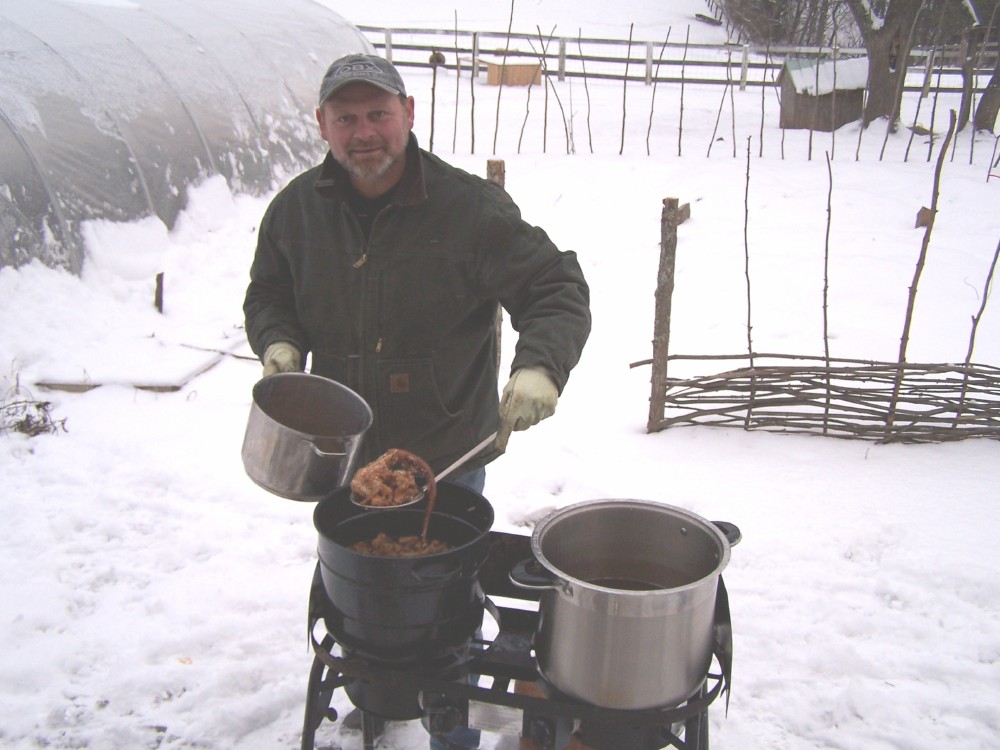
Then we move outside to boil and reduce these pieces.  This demands constant supervision, since the goal is to have the boil hot enough to extract the fat from the pieces, but not to burn the fat.  There is also the risk of fire so its best to keep a close eye on this process.  When cooked long enough, the skin pieces will start to “puff” like the store rinds.

pork cooking

When the pieces are a deep golden brown and starting to puff, they are removed and placed in a lard press.   These presses are getting harder to come by, but there are still some suppliers that carry them.   The lard press can also be used for making apple cider, so it is a handy dual purpose machine to have around.  The press exerts considerable pressure to the cooked pieces and extracts the fat out which pours into a large pot.  In the picture below, you can in the bowl see the pressed rinds in the shape of a disk. 

 pork press


Finally we filter and put the rendered lard into containers.   Some farmer supply stores sell tins made specifically for this.  They are usually large and cumbersome, so we have found that cookie tins work very well.  If you decide to use cookie tins, make sure that the container is not leaking as you pour in the hot fat.  We pour the fat through a cheese cloth in order to filter out the last bits of rind.  These are the coveted “cracklings’ that made the Ingalls children so happy in the Laura Ingalls series of books.  We put the containers outside again to cool quickly, and we are left with beautiful white cooking and baking lard.

 lard done

If I get a chance in the next several days, I’ll provide my lard-based pie crust recipe.  Any questions?  Email!

Meals at Meduseld – Country Eggs Benedict

Food is an important part of life here at Meduseld.  It’s why growing natural healthy food is such a priority.  And, it tastes better.  The lamb just tastes GOOD.  The children are gnawing fresh-picked carrots and talking about how sweet and juicy they are.  The vegetables look and taste so wholesome.sunflower


 Today, we are going to cover another breakfast that is one of our favorites here, Country Eggs Benedict.

  Country Eggs Benedict

If you are following paleo guidelines, you can omit the bread from this recipe.  Otherwise, charge forward! For some of the ingredients I won’t list an amount, because it will depend on how many people you are cooking for.  This applies in particular to bacon and bread.

Ingredients:

  • Bacon
  • Eggs
  • Juice of one/half lemon
  • Butter – 4 tablespoons cold, and 6 tablespoons melted
  • Large tomato
  • Generous bunch basil or other greens.
  • Vinegar
  • Bread (homemade spelt used here – use your favorite)
  • Olive oil
  • Seasonings

 This was homemade spelt bread, toasted in a skillet with olive oil.

Fry the bacon – reserve in warm oven.

To make the tomato mix:

Chop one large tomato.  Chop basil (or spinach, arugula, or other greens of your choice).  Saute in skillet with olive oil.  Salt, pepper and garlic to taste.  Add about one tablespoon balsamic vinegar.   Once heated through, turn off heat and keep in warm place.

To make the Hollandaise:

Some recipes recommend a double boiler and I think this is the reason more people don’t make this delightful sauce.  Let be honest, any mention of the double boiler and people think “this is going to be complicated” and that’d the end of it.  I don’t use a double boiler and you don’t have to.  I use a thick bottomed pot and the lowest heat.

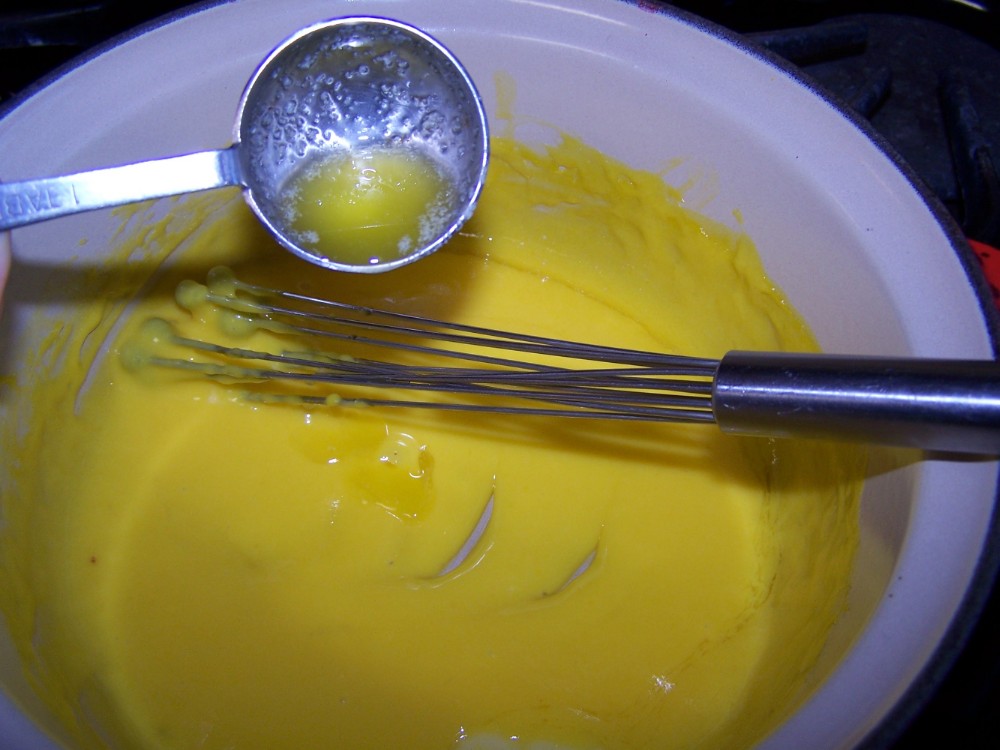
 Over low heat, stir 3 egg yolks with juice from one/half lemon.  Cut cold butter into pieces and as pan starts to warm, gradually add pieces of cold butter.  Stir frequently.  Don’t add another piece until the previous one is incorporated into the yolks.  Most recipes call for unsalted butter, but we use Amish roll butter which is salted.  I know its some culinary sin that would get me kicked out of Le Cordon Bleu, but you use what you have, right?  The sauce will begin to thicken and once you can see the bottom of the pan, like this, turn off the heat.

saucethicken

Take the melted butter and add one tablesoon at a time into the sauce.  Stir well to incorporate each spoonful.  Add salt and pepper to taste.

To poach the eggs:

Take a pan with a large surface area.  Fill to only about 1/2 to 3/4 inch with water and add two tablespoons vinegar and one teaspoon salt.  Bring to a simmer.  If you boil the water, the eggs will break apart.  What you need is simmering hot water so that the water is not disturbed.  

Break an egg in a small cup and gently pour it into the simmering water.  The slower you are the more intact the egg will remain.  allow the egg to start forming firm edges.  Once it has, you can start ladling some hot water over the egg, and this will firm up its surface.  Cook until there are no clear parts left of the egg white. 

 poachedegg

 My apologies this photo is not clearer, but the lense kept steaming up from the simmering water.

Now, assemble.  Take reserved toast, bacon and place on plate.  Ladle a hot poached egg onto the bacon.  Place a couple spoonfuls of Hollandaise on the egg, and to top it off, a spoonful of the tomato-basil mix.  Serve!