Archive | Gardening RSS feed for this section

Disappearing Bees

Dr. Mercola covers the problem of colony collaspe disorder (CCD) and its impact on the almond industry in California this spring.  In his thought-provoking article, he reminds people about the necessity of bees in the world’s food supply and draws attention to the dire consequences if we do not find ways to protect the bees.  Please take a moment to read Dr. Mercola’s article.

Honey bee on Hady Almond at Meduseld

Honey bee on Hardy Almond at Meduseld

Meals at Meduseld – Rose Petal Jelly

Rose Angel in Garden

Angel enjoying the shade of David Austin Rose “William Shakespeare.”

While there is so much work to do, the distractions of the garden are so tempting.  Only a few weeks ago, most of the landscape was starting to green up, and now the roses have exploded in bursts of color and fragrance.

Many of the roses here are David Austin Roses that I have selected for their old world appearance and fragrance, especially next to the front porch where we can enjoy their decadent scent.  A small Carolina Wren couple has made a nest in the tree rose and the babies are almost ready to fledge.  It’s easy to forget trials in so much beauty.  What work?


rosemontage

Since we do not use pesticides on our roses, they are available to eat as well.  A few petals are so lovely and delicious tossed into a salad.  Today, however, I am going to demonstrate how to make Rose Petal Jelly.

Using a  large stainless bowl, gather petals from your pesticide-free garden.  I don’t recommend using sprayed petals.  Here I picked an assortment from the garden, filling the 13 inch bowl.

rosepetalsbowl

If you’d like the deep red color to you jelly, concentrate on getting fuchsia, red and burgundy roses.   Our white roses are the most fragrant and so I add lots of those for flavor.

Rinse rose petals in a sieve and place them in a large pot.  Fill the pot with water to cover.  I have used approximately 13-14 cups.   Bring these to a boil stirring often since the roses petals will want to float at the surface at first.  Boil until they have lost their bright hue and most of the color and scent has transferred to the water – approximately 10-15 minutes.   The darker petals will give up most of their color, appearing pale like this below.

rosepetalsboiling

I have decided I’d like a darker color so I added more dark petals after this photo, bring the water back to a boil to extract their color.

Add the juice of two lemons.  You will notice the juice livens up the color of the water, brightening it.  The acid from the lemons will be necessary for the pectin to work.

Pour the petals and water through a jelly bag strainer.  For convenience, I am placing one in my Amazon store, along with some other items you may need for canning such as my favorite Italian and German canning jars. 

rose jelly bag

Now, measure your liquid back into a pot.  For every cup of liquid, I will use one cup of sugar.  Sounds like a lot, but its standard.  This is one of the few times I use refined white sugar, since it won’t change the color of the jelly.    Bring the rose liquid and sugar to a solid rolling boil.  I will hold it here until it reaches 216-217 on a jelly thermometer.

Here, I add pectin according to the instructions on the pectin, which I bought bulk from the local Amish store.  Please read the instructions on your box, because some differ.  In my case it calls for approximately 3 tablespoons per 3 3/4 cup liquid.    I bring the mix back to a rolling boil for just over a minute, until I can discern the change in texture on my stainless spoon.  When it is ready, it will start becoming solid on the spoon. 

Ladle into sterilized jars.  Seal according to instructions of the canning jar/lid combination you are using.  Process for five minutes in a boiling water bath, and let them cool on your counter.   Enjoy its beautiful color and delicate flavor on toast, English muffins or scones. 

rose jelly done

Garden Progress

Like the rest of the nation, we have had unusual weather.  Temperature extremes, high winds, late frosts, fast storms, and even rainbows have been our lot lately.  We had a spectacular and foreboding looking front move through that departed with purple skies and golden mountains.   


100_6699b

100_6719b

All of this has had an effect on our garden, so let’s step together through our gate and explore within.

garden gate in wattle fence

The first plant to draw my attention is a grapevine still in its infancy.  It is part of the permaculture landscape that we are trying to construct.  Eventually, the back wall of the garden with have a more solid wall in order to hold in daytime heat and create a microclimate.  The vine is intended to travel across that wall.  Close study of the vine reveals not only frost damage, but a dead portion of the nearby black walnut is draped all over it, proving that the walnut tree is dealing with some insect damage.  Looking even more closely, I can find several unwanted visitors wearing black and white stripes. 


100_6737b

Dreadful.  It is the Grapevine Epimenis caterpillar – Psychomorpha epimenis – and we don’t want them there.  Quickly dispatching them, I make a mental note to check the vineyard later.

Moving on I find more damage, but from a different source.  Caterpillars can be bad for your crop, but due to the limitations of their size, there is only so much they can do in a day.  Not so with chickens.  One hen can destroy an entire section of the garden in minutes as has happened here to the brussels sprouts.  (Hence the newly installed garden gate…)


brussels with chicken damage

Perhaps the worst though, was the frost damage from unusual late cold fronts.  Despite it being late May, we still had temperatures in the thirties this week, and last week had frost.  The average last frost date for this area is April 15, so we usually feel rather safe putting the tender plants out May 1.  This year we have lost an enormous amount of plants to frost, some have died completely, others have been significantly set back.  I wonder if the eggplants that I am growing for my dear friend Carol, will be stunted due to the stress they have been through.  That is a real loss.  Carol makes some of the best lasagna ever, and she stews eggplants in her 12-hour sauce mixture.   And here is another ingredient that suffered, and we are keeping our fingers crossed that they recover.  Frosted tomatoes sounds like it should be something yummy with a sugar-coating, but in this case, it’s not good news!

frosted tomatoes

Permaculture Garden 2013

In an earlier blog article I discussed the differences between an organic garden and a permaculture garden.  Both have their applications and benefits.  Sepp Holzer of Austrian permaculture fame, has turned his mountain top into a food-bearing oasis using permaculture methods, while Eliot Coleman has restored his Maine soil and provides unknown bushels of foods using organic methods. (Both books are in Meduseld’s Amazon store.)

Last year, we tried using a full permaculture method for our primary garden and had several challenges.  The heavy layers of mulch created nitrogen excess and made our veggies delectable  to insects.  The helter-skelter method of sowing and planting made it hard for people to harvest if they did not have the day-to-day familiarity with the garden that I had.  In plain English, my husband could not find the bean plants easily – so I had to do most of the harvesting.  It also made it very hard to weed or to manually pick off insects due to the mini-chaos that ensued from helter-skelter planting.

Another negative that this method causes is that it makes crop rotation difficult if not actually impossible.  Considering the diversity of plants we had planted in close proximity to each other, this year it is impossible to ensure that I am not putting cabbages again in places they were last year, or tomatoes – well, you get the point.  As Mr. Coleman points out in his book Four-Season Harvest, crop rotation is a very important part of controlling insects naturally.

On the other hand, the key-hole beds and meandering paths made the garden far more picturesque and turned the garden into a destination instead of a chore.  As a result, we are considering placing seats in the garden so that we can spend more time there. 

So this year we are doing a modified perma-garden.  I am planting things in sections and sometimes alternating two types of plants,  such as onions and cabbages.  This year’s garden also has far more flowers.  At first my focus was on marigolds for their insect preventing properties, but then I expanded into other varieties of annuals such as petunias, alyssum, and ageratum.  Is it possible that these flowers, in addition to being eye candy, might not also have other benefits?  Do they draw beneficial insects or fix nutrients in the soil?  It’s hard to believe that they would have only one function. 

Although set back by a late May frost, the bulk of the plants survived and are starting to struggle past the cold spell.  I wanted to share the  progress.   In case you’re wondering, the rocks are not stonehenge; they are my hose guides :)

PLEASE CLICK ON PHOTO TO EXPAND IT SO IT SHOWS PROPER PERSPECTIVE.

maygarden

Madness

One definition frequently given of insanity is to do the same thing over and over and expect a different result.  We have a fine example of that in the genetical engineering corporations, who push their GMO seeds and products on farmers worldwide.  These farmers are given the promise of better yields and higher profits.  The reality is that these products increase the use of herbicides and pesticides.  It has caused such significant problems in India that there is a crisis of cotton farmers committing suicide, and that is worth an article of its own.  Additionally, Vandana Shiva states in a BBC Interview that a “billion people go hungry because of GMO farming.”

But the problems with GMO crops are not just with the agricultural and toxin issues, it also has to do with what these feeds do in human and animal bodies.  I have already attached videos from Dr. Don Huber who is an expert on glyphosate (commonly known as “Roundup”) who has written and testified frequently on the grevious problems caused by glyphosate ready crops.  I have also provided links to a GreenMedInfo article showing the cancerous tumors that developed in rats fed GMO corn. 

The latest in the craziness is now emerging.  Researchers have now altered the genetic structure of wheat so that it “silences” how the wheat handles carbohydrates.  My guess is that someone is trying to produce a lower carb wheat to satisfy the trend for lower carb diets.  However, there is reason to believe that this gene alteration can be absorbed by human bodies, silencing how the body can handle and store carbohydrates.  Here is a video provided on GreenMedInfo’s website called GMO molecules May Silence Hundreds of Human Genes.  It is only 4 minutes long and certainly worth the time to understand the ramifications of dabbling in GMOs.

Please share this blog with as many people as possible since the GMO issue has been obscured by special interests.  This article provides many helpful links in one place that cover the madness.

Permaculture at Work

The last month has been rather hectic, not affording much time for working in the hoop houses, certainly not as much as I have in the past.  Yesterday, being one of the first really gloriously beautiful days of the spring, I went out to work in the poor neglected hoop houses and take stock of the situation.

My oh my oh my.

Hoophouse Chard


Here the chard is doing tolerably, but I have allowed the weeds on each side to go to seed.

 The stunted kale is starting to bolt from the heat, and it is also surrounded by weeds that have developed seed heads.  On its right, you can see bolted lettuces.   I also found aphids on the carrot top greens.

So here is the  option I am faced with – weeding this entire thirty foot hoophouse, and distribute lots of seed heads as I do it.  But I really don’t want to do that.  The seeds I leave will sprout, and in pulling the weeds, it will take a great deal of the valuable dirt we have built up.  Aha!  The next option – chickens! 

I went directly to the computer and pulled up McMurray Hatchery’s website, a large-scale chicken hatchery that operates out of Iowa.  They ship day-old chicks all over the continental United States and these adorable little peeps come straight to the post office.  I was very fortunate yesterday – when I went to the broiler chick page, it stated that the April 22 shipment date had a very limited quantity available.  The next ship date would not be until June!  Too long for the hoophouse to wait.  I picked up the phone and got a representative who took my order for 25 chicks for the April 22 date.  I clicked refresh on my computer – and the April 22 date disappeared from their options.  I had gotten their last 25 chicks for that day.

So for the next several days we will eat out the chard and other edibles in the hoop house, and by the time the chicks arrive everything left will be for their consumption, including the aphids on the carrots.  So this is the beauty of permaculture.  It is literally labor-saving, as the chicks will do my work of removing delectable weed seed heads.  The chickens will consume the slugs and other insects, and will feast on luscious bolting greens.  These chicks won’t be contained in a small space – they will literally have 408 square feet of greens-filled space .  This, in addition to their organic diet from Countryside, will provide a well-rounded diet and create nutritious birds not raised on soy and GMOs.  Even this is a win-win situation, since I will be able to coordinate with Eva of Ironwood Farm on the Countryside delivery, and we can save some gas (it’s my turn).  Eva is currently raising some chicks and you can read about her adventure here.

And 6-8 weeks from now, I’ll have a perfectly clean hoop house.  By mid-June  that hoop house will again be available for planting with cucumbers, melons, tomatoes and other plants that can withstand the heat and actually thrive in it.   And I won’t have done any of it :)  Permaculture.


Permaculture

I have written about how we use the principles of permaculture in running our farm, and thought it might be good to elaborate on it.  It is a relatively new concept, considering its brief period in the long history of agriculture, from the fertile crescent to the present.  Many people I talk with do not know what permaculture is, but fortunately there is growing interest. – there is even a permaculture group on Ravelry :)

Permaculture is a process of getting the different facets of gardening and agriculture to work in unison so that they support each other and enhance the health and outcomes for each system.  Those systems are gardening or food production, livestock, and aquaculture.  Permaculture takes organic gardening to its next step and encourages making decisions based on how to permit each system to function best rather than forcing that system into a situation it would not thrive in.  The greatest example of forcing a system is big agriculture, which grows only one crop in an year under circumstances that compell the farmer to use pesticides and herbicides.  This is “monoculture.”  In monoculture, two, or perhaps three crops migh be rotated in order to try to dimish insects, but overall, the system relies on chemicals and depletes the soil.

In organic gardening emphasis is placed on using organic methods to reduce unwanted insects and to protect beneficial insects such as honey bees.  Organic gardening encourages the improvement of the soil through composting, frequent crop rotation, and avoidance of chemical fertilizers.  It still uses monoculture although under a smaller scale, and due to the better soil structure, the plants tend to be healthier and less prone to insects. 
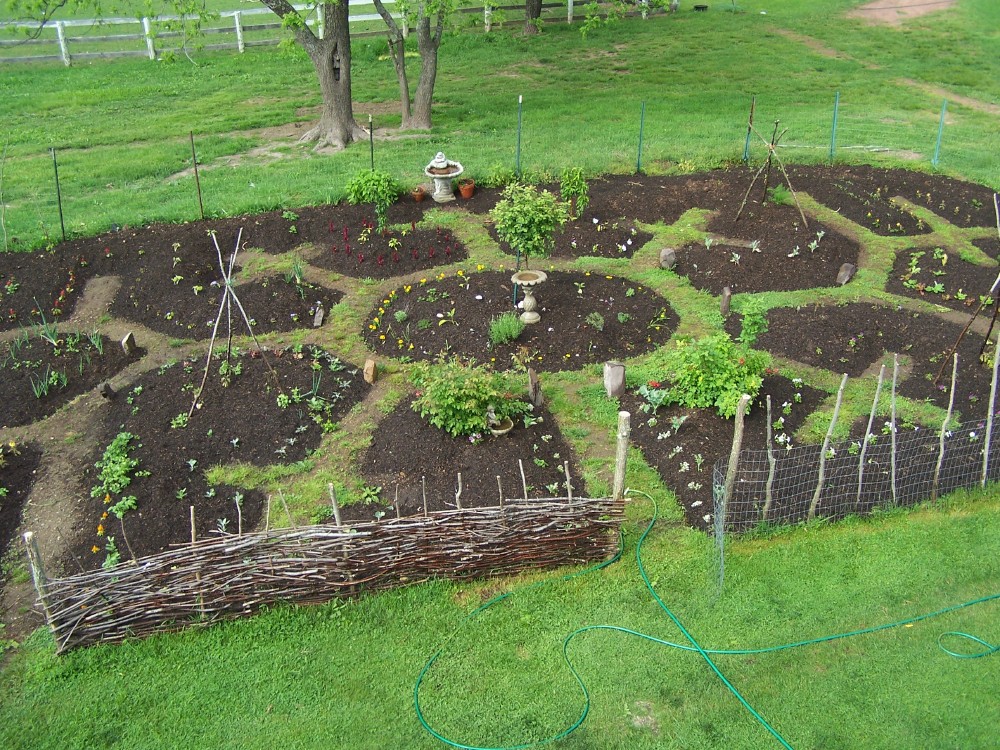
Organic Garden

Organic Garden

Now take this to its next level.  Permaculture encourages not only crop rotation, but animal rotations as well.  For example, by rotating chickens in an area of the garden, they can clean weeds, remove insects and fertilize.   Instead of being forced to live and scavage off the same area, the chickens can be moved around frequently, do their work to improve the soil while benefitting from the system at the same time.  This, is permaculture.

Permaculture - same garden.  Compare tree trunks in background with photo above.

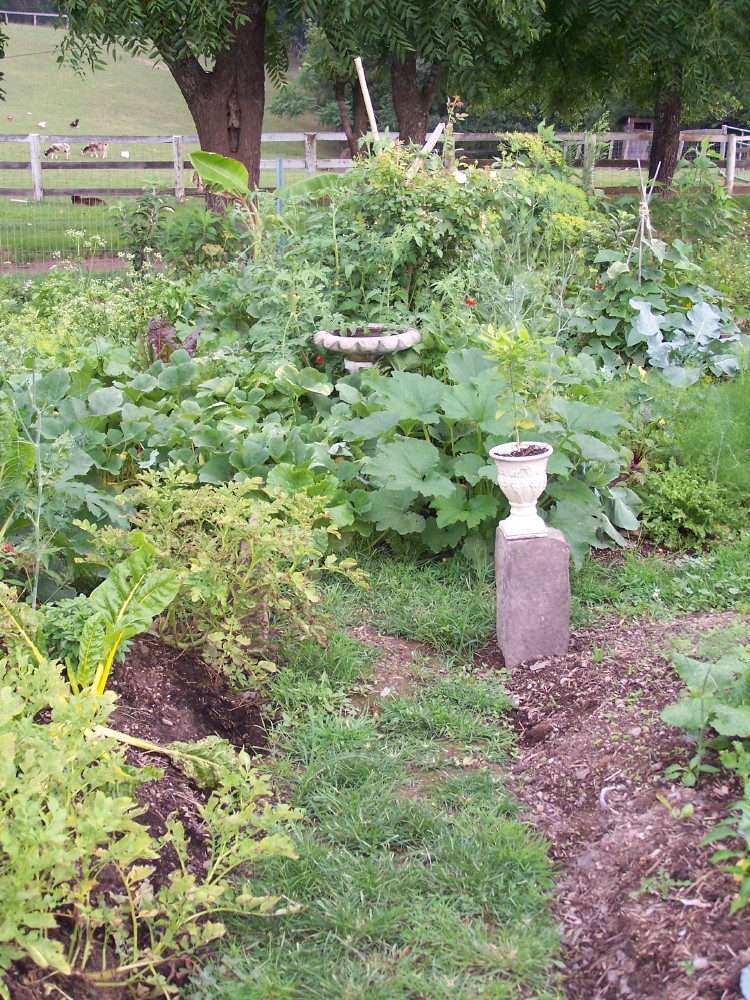
Permaculture – same garden. Compare tree trunks in background with photo above.

It extends to all the aspects of raising food.   Trees, animals, plants and humans all are encouraged in their respective roles in order to improve the overall health of each.  Trees can provide wind breaks and create microclimates for raising more varieties of plants.  The plants can be chosen by the different nutrients that they tend to “fix” in the soil.  Most of the us have heard about beans and legumes such as clover being capable of nitrogen fixing.   Diverse plants can fix all sorts of minerals into the soil. 

You can also use plants to aerate the soil.  We recently had to large black pigs, heirloom type pigs that will forage and produce a healthy, non-GMO meat.  We rotated them through our front pastures, and in one of them they entirely rooted up most of the turf.  Instead of seeing this as a problem, we encouraged it.  They removed most of the grubs without us having to resort to other methods, and by rooting up the surface, we were able to overseed this pasture with better diverse grasses, forbes, and even turnips.  Yes, turnips.  We deliberately sowed in thousands of turnip seeds.  As the sheep and cattle graze they will pull this up by the roots, and we will have succeeded in aerating the soil, effortlessly.  The sheep will benefit from more diverse feed.

Even placing large rocks in the garden can have their purpose.  Mine serve as hose guides, but they also radiate heat to nearby plants at night encouraging their growth.  Sepp Holtzer, one of the permaculture greats, noticed this while very young and deliberately started putting rocks next to his strawberry plants.  Sepp has been using permaculture methods since before it was even called by that name.   Permaculture also makes use of  microclimates around buildings.  Despite being in Ag Zone 6, we are able to grow a very large and productive fig tree on the south side of our house. 

Another method of holding heat in an area is through ponds and other water sources.  Sepp found that water retains more heat than air and that this also benefits the plants.   He is able to grow food for hundreds of people, despite being 1,500 meters above sea level.  No that’s not a typo.  I have added his book to my Amazon store on the right side.  This book also has information on nutrient fixing, plants that can help you identify the existing state of your soil, and advice for reclaiming damaged land.

There are some permaculture “experts” to watch out for.  Some of the groups have as part of their criteria penalizing  people who do not change their mindset or actions, and this is a slippery slope as far as I am concerned.   It’s one thing to encourage people, to educate, but it’s quite another for one group to take a one size fits all approach to life.  Another thing to watch out for are those whose enthusiasm is wholehearted but their recommendations are not.  Our garden suffered a great deal from the faulty recommendations of Toby Hemingway, and now having gone through Eliot Coleman’s books as well as Sepp Holtzer’s, I can see the mistakes that were made. 

For example, Toby recommends multiple layers of mulching and planting in these layers, while Sepp shows how to bury a tree and other composting materials into a berm and cover this with soil, scattering the seeds into the soil.  This difference is huge in its impact.  Toby’s method of planting small plants or seeds on mulch that has not composted means that no nutrients are available to the plant.  The multiple layers prevent aeration of the soil, and finally, as the mulch composts at the top layer, it gives off too much heat, overheating the little plants.  Whereas Sepp’s method plants the seed directly in established soil that can nourish it.  The composting layers beneath provide nutrients to the plants when the plants roots grow long enough to reach that layer.  And the warmth of the composting materials is deep in the soil where it encourages growth instead of overheating the plant at the surface.  These berms also make harvesting very easy – you don’t even have to lean over :)

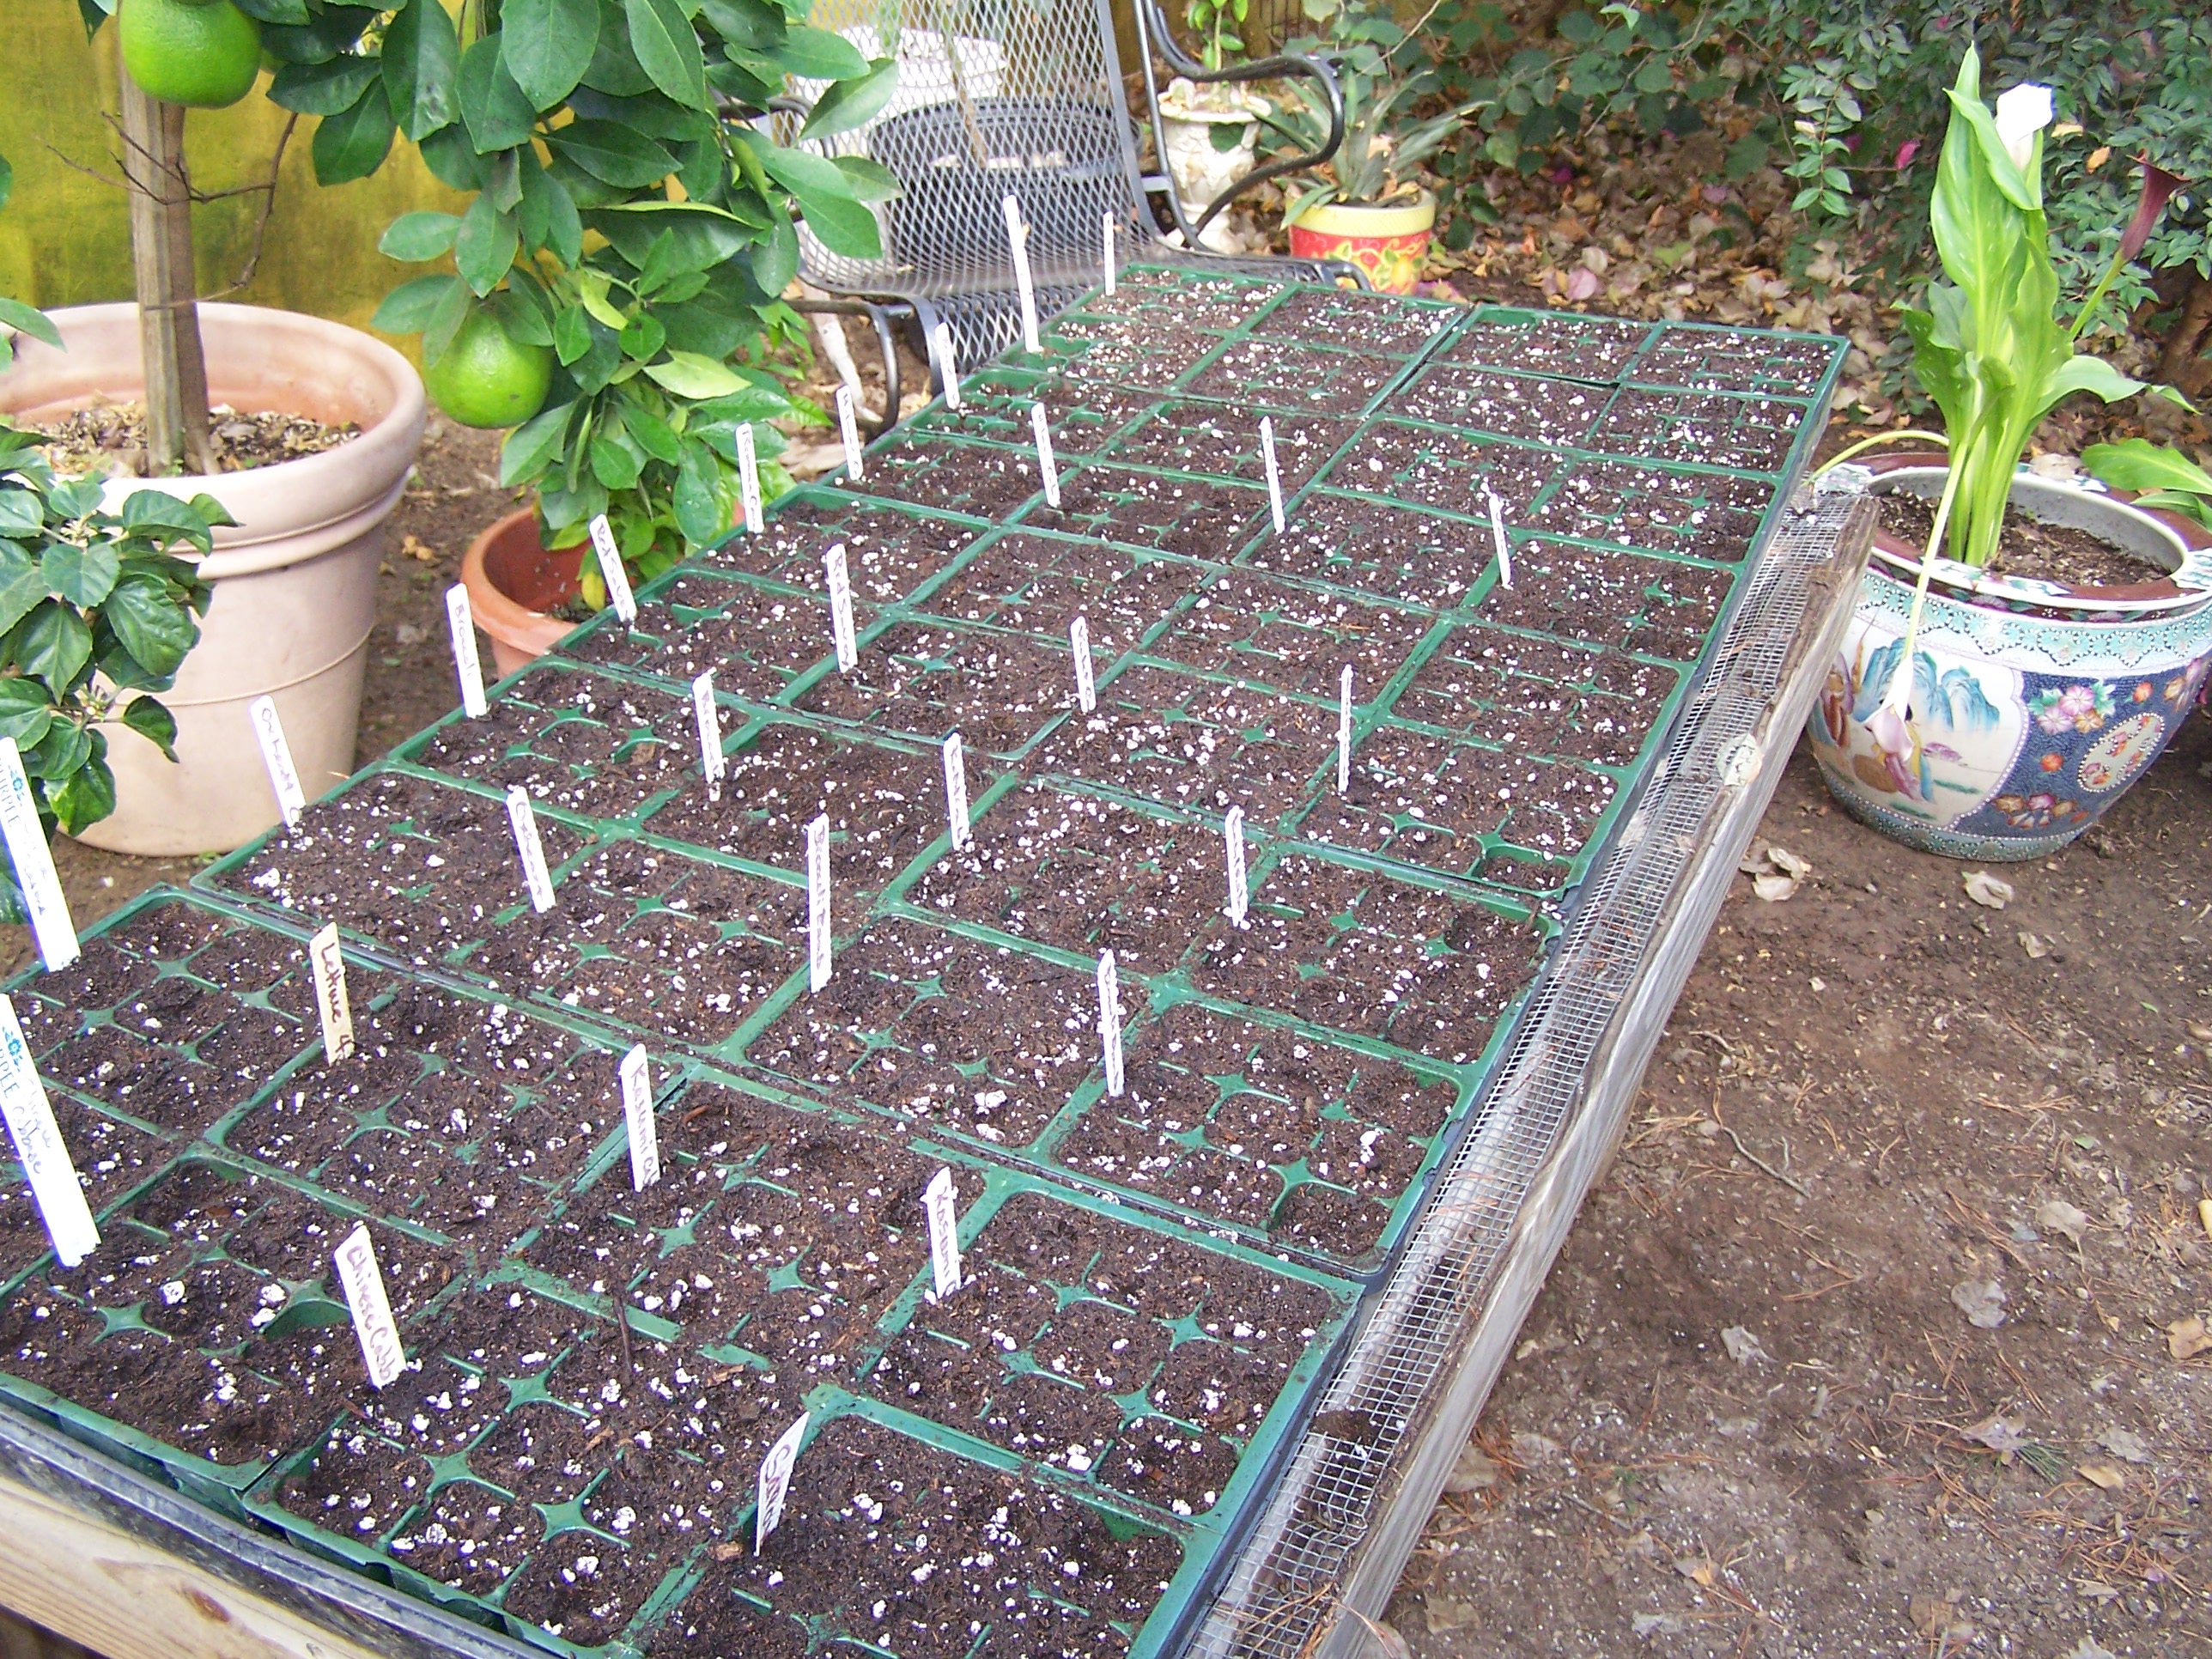
I also learned last year that the garden will have to be kept more organized.  If you google permaculture pictures, you’ll find that most look disheveled like ours above.  (You’ll also find alot of “conceptual” drawings – lots of people talk about permaculture conceptually, but have little experience in practice.  If you open a permaculture guide and its mostly drawings, move to the next one.)  I find that the sloppyness leads to being unable to find all your vegetables as they ripen, or deal with weeds and insects from all sides. 

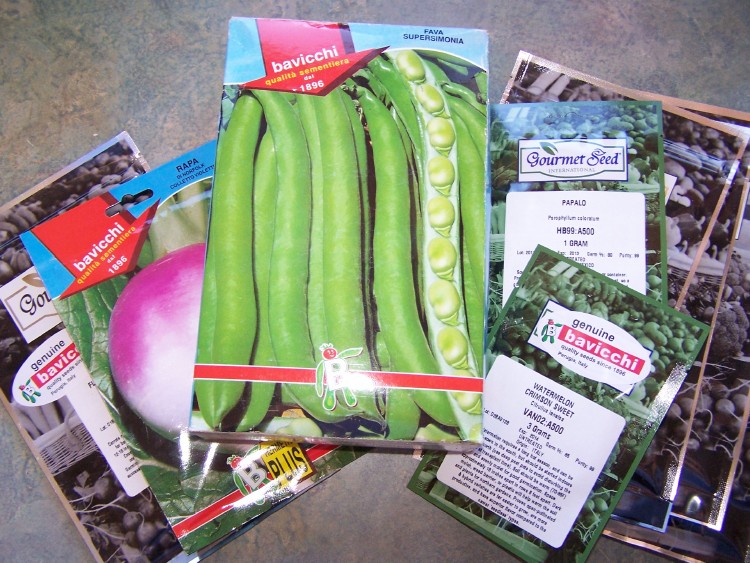
The main book on Permaculture is by Bill Mollison, Permaculture a Designer’s Manual, and I was fortunate to be able to borrow a copy since it is out of my budget.  I have placed it in the Amazon store as well, and it is worth the $100.00 price tag for what it will pay back to you in productivity and saved time.  Quite frankly, it is brilliant work.

Wattle Fence, Crocheted Vest, and Village Green Network

Several things to discuss today.

You may remember the first wattle fence article with input from the Frontier Culture Museum.  At the time, I advanced the theory with my husband that the wattles would create a cooler area on one side and a microclimate of warmth on the other.  Well, I can’t confirm my entire theory yet, since we have yet to finish the fence :)  Lack of cooperation with the weather I say, but none-the-less, we have been working on raising the other side.  I know there are lots of global warming alarmists who insist the planet is getting warmer, but we had snow in October and snow in March, which makes 6 months of snow, and I thought winter was generally three months longs, plus or minus, but I digress….

So, despite all the gaps between the branches, and all the sun that it still permits to go through, the snow last week confirmed part of my theory.

wattlesnow


We had highs in the fifties both Saturday and Sunday and experienced almost a full melt of the snow.  Almost!  Here is the one portion of the garden where the wattle is complete.  I know where my spinach and lettuce are going this year :)

Second, I finished a fun little project, something I had wanted to try lately, one of the little jackets or vest crocheted in the round.  This was made in a size small out of 100 percent mercerised cotton from Greece.  It has a lovely sheen and a ribbon-like feel.   The vest is available in the Meduseld Store.

roundroseflat


Spring Planting

While we still have snow on the ground from the late snow on March 6, today we are hauling out our seed box and starting flats of seeds for this year’s garden.

Even for an experienced gardener, each year contains a little trial and error.  Sometimes a lot, like last year.  I tried some new gardening methods from a book called Gaia’s Garden (no link, I don’t recommend it) and we ended up with some setbacks in the garden.  Maybe that’s an understatement.  The book recommended multiple layers of mulch, from straw, to compost, cardboard and finally shredded mulch.  So we can all agree that weeds were not a big problem.  However, all those layers of mulch breaking down made the conditions too acidic for the plants, and most had failure to thrive.  The plants that managed to grow became insect candy.  Now, since we’ve been growing organic for many years, we are used to a certain level of insects, but this is ridiculous!  One thing that grew well in this soil was turnips.  After figuring out that even the children will eat turnips if you use enough Romano cheese, it ended up being a beneficial crop. 

The book I mentioned advocated permaculture gardening, a method I strongly endorse in general.  This method encourages the cycles of plants and animals and humans in such a way that each benefits the other and creates a system where each sustains each other.  Monoculture – planting only one variety of plant in an area – is discouraged for requiring extra fertilizer and making it very easy for insects to take over a crop.  Permaculture encourages planting diverse things in an area so that insects have a more difficult time finding the type of plant it feasts on.  The diverse plants each have different nutrient fixing properties (like beans with nitrogen) and the plants can improve the soil instead of depleting it.  Permaculture also advocates the creation of microclimates that help each plant to thrive.  For example, placing a stone next to a delicate plant will give it additional heat at night and help it grow.  We are able to keep a large fig tree by planting it on the south side of the house – a microclimate.  I find that Sepp Holtzer has wonderful advice since he’s been planting this way since before it was called permaculture.

The areas of the garden where I ran out of all these mulching materials did much better and here are some of the gorgeous vegetables we were able to grow last year.  All pictures below are from our garden and not stock photos:)

 veggies

This year the mulched areas have had time to break down further over the winter and I am hopeful that this will yield ideal growing conditions.  We’ll do some soil amendments recommended by Eliot Coleman in Four Season Harvest (a book I highly recommend!) and keep our fingers crossed for a good growing season.

So, with my husband next to me talking about scranlettin tipcklepenny corner (can anyone guess the source?) lets start planting!  The best seeds and value are from GourmetSeed.com.  We can’t say enough about this company, and this blog links to them on the right column as well as from our farm website.  They import most of their seeds from Europe which is a benefit since Europe has so consistently banned GMO crops.  That means we don’t have to worry about cross-pollination with undesirables.  The quantity of seeds that you receive for the money is outstanding.  I frequently make comparisons with the other seed catalogs we receive, that will usually have 50-100 cabbage seeds in a packet.  For the same amount of money, the Gourmet Seed packets will usually have about a thousand.  I could not make this up – start comparing some seed websites for your self!

gourmetseed.com

gourmetseed.com

First, the easy ones that can go directly in the garden right now.  As soon as the melting snow reveals the black earth, we can start planting the hardiest varieties such as fava beans and peas.  Fava beans are delicious, and are much better known in Europe than they are here.  They are a wonderful way to put early vegetables on the table.  The peas are hardy and a favorite with our family, and need to go in now.  If planted too late, the hot summers here will stunt them. 

We will start the seed trays in the conservatory, although we could do them in the hoop houses as well.  The temperature in the conservatory is much higher though, and the seeds will germinate more quickly.  The conservatory is also much more humid and the seeds are less likely to dry out.  You can start seeds successfully in a sunny window – morning sun is best.

Eliot Coleman has his own recipe for making soil blocks, but we do not use those.  We have an abundance of seed trays we were given, and we recycle those each year.   For this operation we do use the organic seed starter mix which seems to prevent damping off – the early death of a seedling from some unknown cause, most likely bacterial or fungal.   We will start with hardier varieties of plants, Brassica family plants like cabbages and broccoli, lettuces and spinach.  In a few weeks we will start the tender vegetables such as tomatoes, cucumbers and peppers. 

Here are the seed trays that we have planted today – five trays with 72 cells each should make a good start for the garden in a few weeks.  The seeds used are radiccio, lettuces, chard, cabbages, broccoli, brussel sprouts and more. 

 100_5963


It was heavenly to plant the seeds only feet away from fragrant orange blossoms. 


orange blossoms


We also had another baby lamb and we are pleased to introduce Comet, in honor of Comet PanStarrs.  Here she is in her little black dress.  Her fleece is stunning and will make beautiful naturally colored yarn.

Comet - Freisian/Jacob Cross Ewe

Well, we need to go drain the well.  One of the neighbors is missing…

Wattle Fences and Frontier Culture Museum

This weekend the weather was gorgeous.  Highs in the 60’s with sunshine.  It seemed a perfect time to start a project we had been discussing for some time, making a wattle fence.

Here you can see a picture of the fence that had been in place.  Functional, yes, attractive, NO!  However, with all the feathered friends that run around this property, it is important that we close some areas off to them, otherwise, no vegetables for us.

 gardenbeforewattle


 Our garden used to be in rows, but last year we went to permaculture inspired “key-hole” beds.  The garden is divided into sections and the interior of each section is accessed by a small path called a keyhole.  The garden will not be tilled, and the soil is not compacted by walking on it.   It has it pros and cons.  One of the benefits is that while with row gardens, fifty percent of the garden is walked on, with Key-hole gardening, about 70 percent of the garden is plantable space.  The stones are my hose guides.

Back to fencing…

There were several reasons that we choose wattle fencing.  By placing a more solid type of fencing on the north side of the garden, we are hoping to create a micro climate in the garden.  The fence will protect the garden from the wind, and hopefully hold in more heat from the sunlight.  We also chose the wattle fence because it uses available resources without us having to purchase fencing.  This fence will be a great deal more work, but there is no expense involved.  Another benefit is that we are thinning the saplings and branches and creating areas where the remaining trees will not have to compete as much for nutrients and sunlight.

There are actually technical terms for the parts of a wattle fence.  The uprights are called “sales” and the horizontal branches are called “weavers.”  The sales can be a bit sturdy, but the weavers need to be thin (less than an inch in diameter) green, (fresh woods bends more easily) and long, as long as you can find them. 

Here we have started setting the sales.  At each end of this section we have placed locust wood posts.  Locust wood does not breakdown quickly like pine, and so these posts should be around for a while – hopefully ten years or more.  Between the posts, we have placed the sales at approximately one foot intervals using a tape measure.   We forced the sales into the ground using one of two methods, “drilling” holes with a cordless drill with a massive bit, or with a post hole digger.  Post hole diggers can be bought at hardware stores.   The sales should be firmly in the ground for the integrity of the fence.


fencesales

Now we can start with the weavers.  Starting at one side, gradually work a trimmed branch between the sales.  Make sure that the branch extends slightly beyond the post.  When the weaver is used, start with another weaver around the same sale and proceed across the row until reaching the other posts, and leave the excess there.  Now return across the row you have just made, making sure that you alternate which side of the sales you are weaving through. 

Historically, wattle fences were also made into “hurdles,” short eight to nine foot sections of fencing built into logs or boards about the size of railroad tracks instead of into the ground.  These sections were used as moveable fencing for sheep for pasture rotation.  With hurdles, the ends of the weavers were not left as we describe above, but were twisted and turned to wrap back around the post into the sales again.  This makes a very durable hurdle, but in our case, we need the posts to hold our gates, and so we cannot wrap the weavers or we won’t be able to mount the gate hinges. 

We have now done several rows of weaving.  This is forming a strong fence – each row of weavers is making it more durable. 

fencestarted

Here is how it stands today.  It is a work in progress with a deadline.  This fence must be done before the seeds are planted in the spring!

 If memory serves correctly, the Frontier Culture Museum in Staunton, Virginia had a wattle fence surrounding their German homesteader garden.  This living museum is a wonderful place to acquire old time skills and we recommend this place heartily!  There are docents in period costume showing old world skills, and they often invite the children to participate.  It is very family and children friendly, and if someone in your group cannot walk the entire tour, the Museum rents family-sized golf carts for touring the farms.   Here is their website.  http://www.frontiermuseum.org/index.html

In addition to touring the grounds, you can attend diverse classes and there are even homeschool events.  This is one of the best and most educational opportunities in the Shenandoah region, and it is engrossing for the children as well.

 Noon update:  Since posting this morning, I was delighted to get this email from Alex Tillen at the Frontier Culture Museum (FCM). 

“This spring the Museum once again will build a wattle fence on the Irish farm out of ash, willow, and any sapling we can find on the wooded areas of the Museum.  This time we are going to use locust saplings as the post to see if they will last longer then a few years.  We also plan to make some wattle hurdle fence sections on the Irish farm.”

He also provided these photographs of wattle fences the FCM had had in the past.  Sincere thanks to the Frontier Culture Museum!

frontierwattlecowfrontierhurdle